Banner Credit: Jayden Wiebe
Design 2055: CAD 2
Prerequisite: Design 1050 - CAD 1
Outcomes:
1. demonstrate intermediate knowledge and skills required to operate CAD software
1.1 acknowledge the advantages and disadvantages of various types of CAD software available
1.2 identify and demonstrate appropriate use of software and hardware
1.3 effectively manage file types and folders according to industry standards
2. use CAD tools to create 2-D and 3-D drawings to demonstrate the following intermediate skills
2.1 identify and demonstrate appropriate tools, methods and functions; e.g., insert and explode, wire frame, solid drawings, polylines, coordinates and vectors, isometric grid/snap tools
2.2 select and use CAD tools, methods and functions to produce layered multiview drawings and pictorial drawings and/or surface developments based on pictorial sketches or real threedimensional objects
2.3 print/plot or display drawings/renderings or animation
3. produce and present a portfolio-ready drawing, image or rendering
3.1 participate in interim critiques; e.g., self, peer, instructor
3.2 discuss intentions and decision making related to the application of elements and principles of design
3.3 present images and/or model(s) for assessment
3.4 maintain a design folder, journal or sketchbook as part of the portfolio of ongoing activities that illustrates skill building
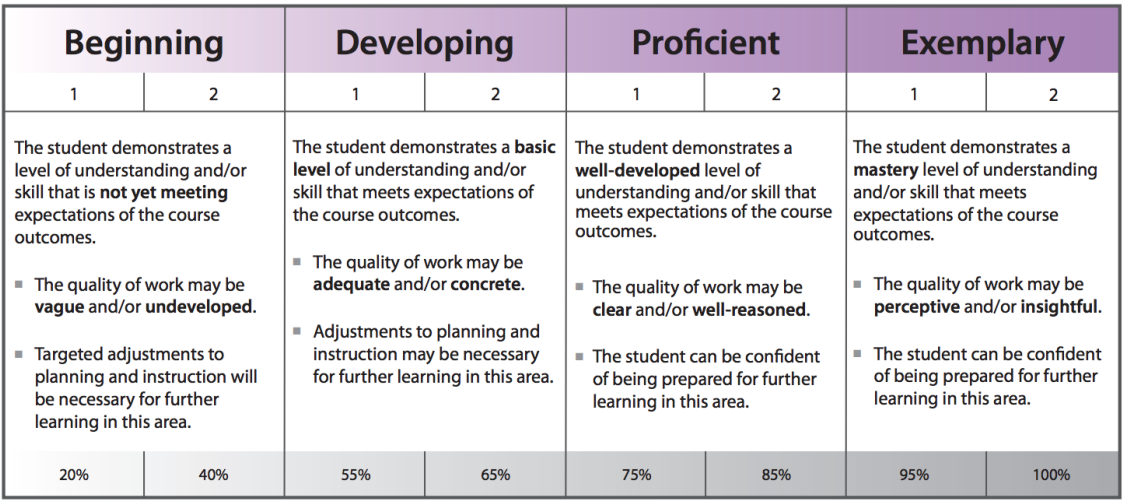
High School Assessment Rubric:
Assignment 1: Sculpting a Ghost
Your first assignment is to work with the sculpting feature in fusion 360. Here we go!
Here is the tutorial I worked from... this guys channel is great for fusion 360 fyi.
https://www.youtube.com/watch?v=8aUoMuorUFI
Here is the tutorial I worked from... this guys channel is great for fusion 360 fyi.
https://www.youtube.com/watch?v=8aUoMuorUFI
|
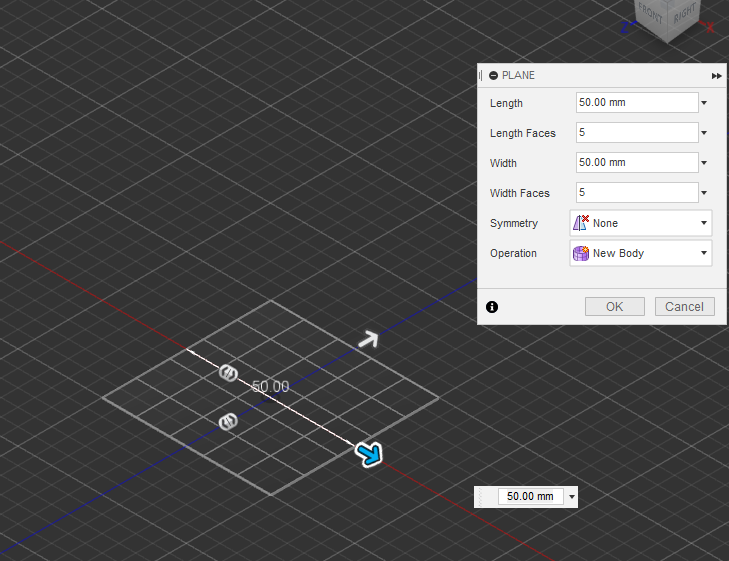
Step 1: Start by going into the create form command (looks like a rounded block in the menu).
Use the plane tool and make a plane that is 50mm x 50mm and has 5 length and 5 width faces |
|
|
Step 2: Delete the corner vertices. Select the corner of the planes and hit the delete key
|
|
|
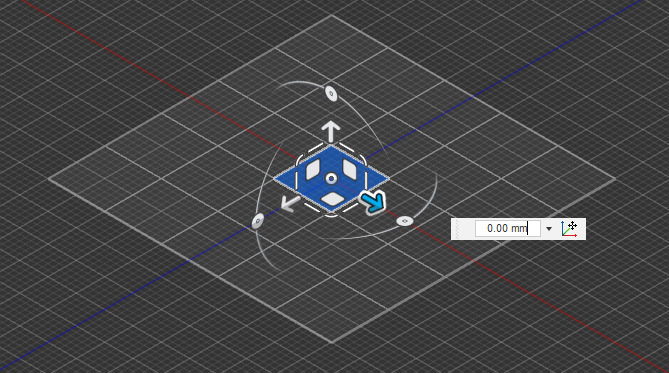
Step 3: Select the middle 9 squares, right click and hit edit form. To select multiple things on a computer, hold ctrl when selecting. Bring the form up by 30 mm. Next, select the middle square and bring that up by another 30 mm.
|
|
|
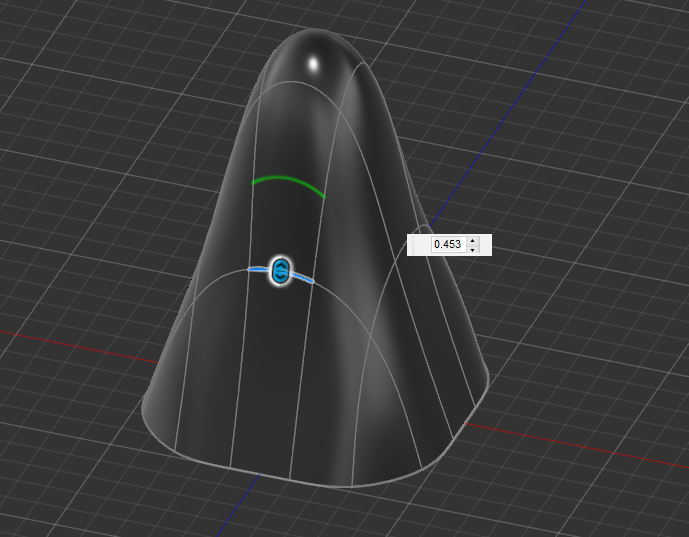
Step 4. With the top middle square still selected, click on the circle of the menu and move it out to thicken the top (by about 2.5 mm.). Grab the top arrow again and pull straight up another 10mm.
|

|
|
Step 5: Click this edge and right click and hit insert edge. insert an edge where indicated.
|
|
|
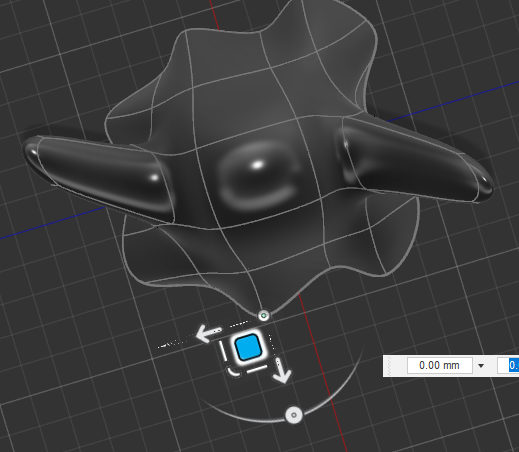
Step 6: Right click and edit form on the new square you have created. HOLD THE ALT KEY and click on the front square and extrude it out like an arm by about 20 mm. Do the same with the other side. You can experiment and pull your arms any way you like at this point.
|

|
|
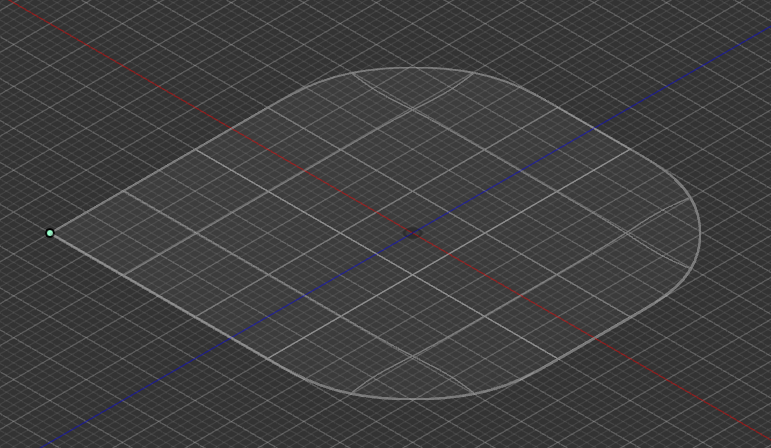
Step 7: Go to a top view and grab the edge vertices and edit the form with the square. Make the edges more ghosty. At this point you have the option to select any edges, or lines and modify your form to make it more ghosty. IMPORTANT: Make sure you ghost is the way you like it because the next step is to "finish form" which will have you leave the scultpting environment. For GOOD! OOOOOOOOOoooooo....
|
|
|
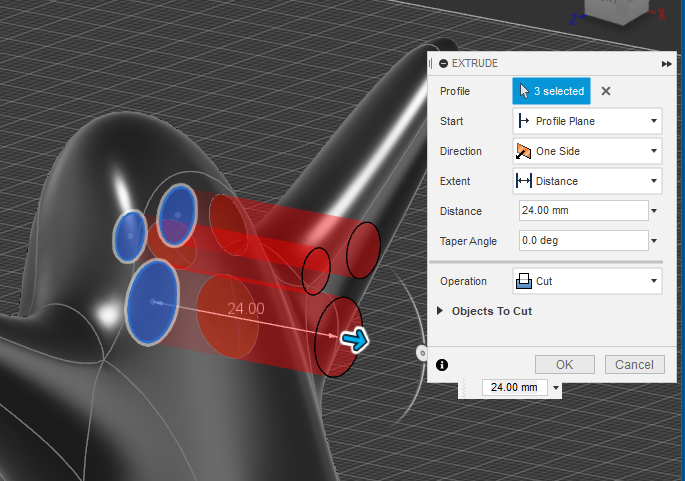
Step 8: Once you are out of the scultping environment you will need to make some holes for the eyes and mouth of your ghost. Under the sketch tool, select your plane of sketching and sketch 3 circles for your eyes and mouth. Then extrude the circles through your ghost. (you may need to toggle on or off your body with the eye on the left) instead of extruding, instead, use the cut command.
|
|
|
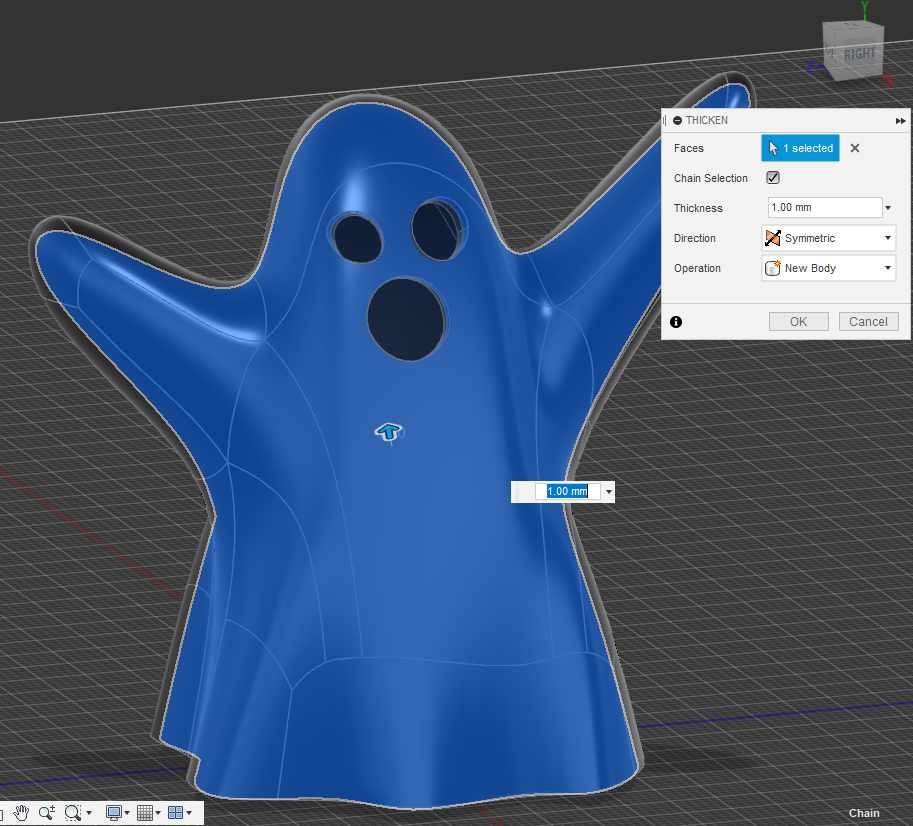
Final Step! Use the thiccen tool under create and select your whole model and thiccen to 2 mm. This will give your form depth and keep it hollow so if you want to put a spooky light underneath etc... now youre done! Prepare for print!
|
|
Assignment 2:
Your first task is design a 6 sided die. This will get you working with guides to make things proportional.
|
Step 1: Draw a sketch the size of your die. 20 cm x 20 cm is decent to start. You can make it bigger if you like, but not too big. Extrude it to make a square box.
|
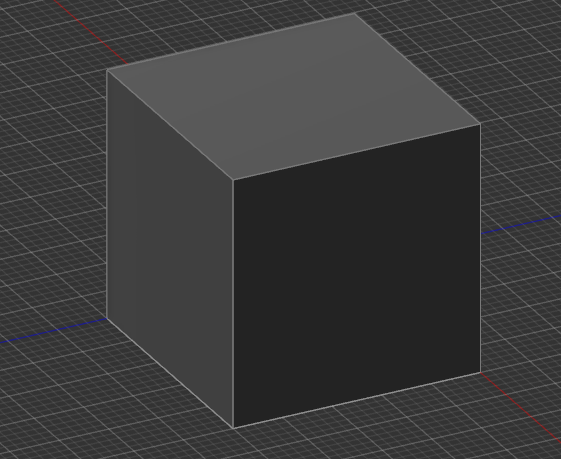
|
Step 2: Use the fillet tool to round the edges to make the dice roll smooth.
|
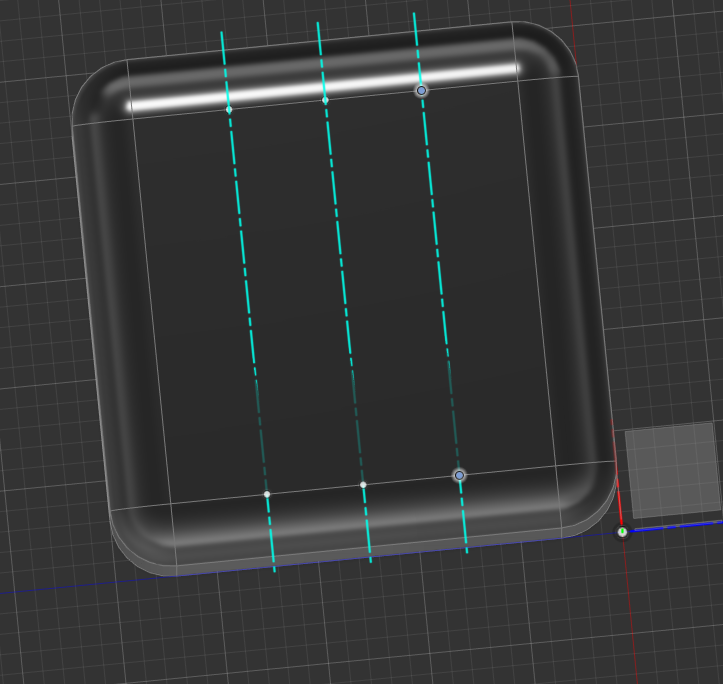
Step 3: This is where things get a little tricky. We are going to work with the construction menu. Mainly two tools, axis across two points and point along path. Depending on where your dots (numbers are on your die) are you will use axes to find the correct position. Here is the example for one:
Now you have a reference to sink your hole. Which you should know how to do by now. |

|
|
Step : Use the point along path to make points to cross your axes across. I put mine at 25%, 50% and 75% for proportions. Here is an example for 6.
Sink the holes at exactly where the lines intersect. Make the holes uniform. Research your dice to make sure your numbers are on the correct sides. |
|
Assignment 1 extension: Anyone who can craft a working full set of Dungeons and Dragons dice gets a guaranteed 90% on this module.
Assignment 3: Coffee Mug!
For your second assignment I would like you to sculpt a coffee mug. We will end up sealing it so it is usable, so use the correct proportions. This tutorial will introduce
|
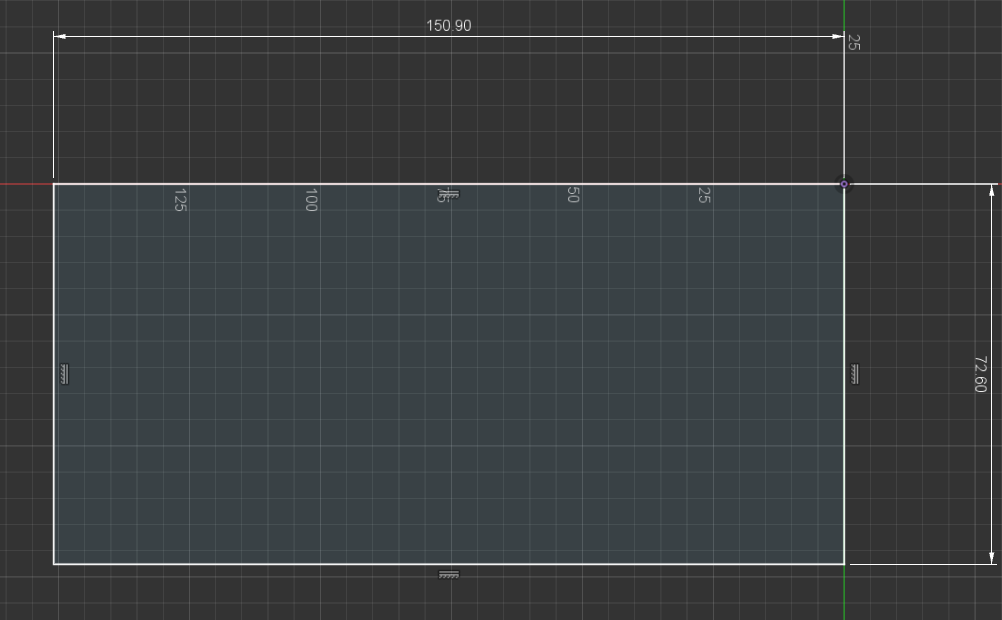
Step 1: Sketch a 90 mm diameter circle. Extrude the circle to about 100 mm height.
|

|

|
|
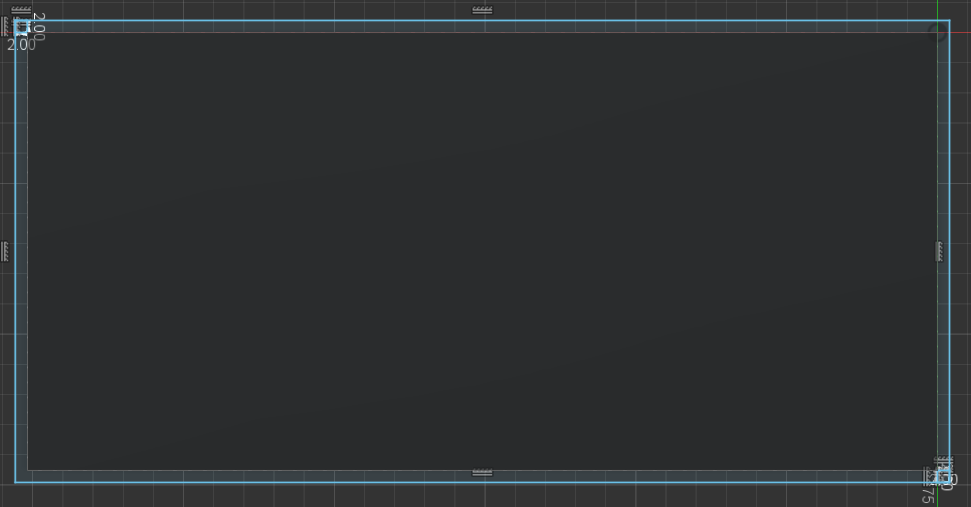
Step 2: Sink a negative space cylinder into the cylinder you have created. Leave about 5 mm for the mug wall.
|

|
|
Step 3: Here is where things get a little tricky. We are going to mess around in the sculpt environment. Hit CREATE FORM in the menu. In create form, craft a cylinder 15 mm diameter and 70 mm tall. Make sure the cylinder has at least 15 manipulative faces. Take care to place it on the midline of your coffee mug. This will help when you move the form into the cup later.
|

|
|
Step 4: Select the faces you want to rotate and extend into your coffee mug. Holding control or shift will allow you to select multiple faces. Once selected, right click and hit the EDIT FORM command. Then, play with the selections until you can rotate your tube 90 degrees and extend it into your mug.
|

|
|
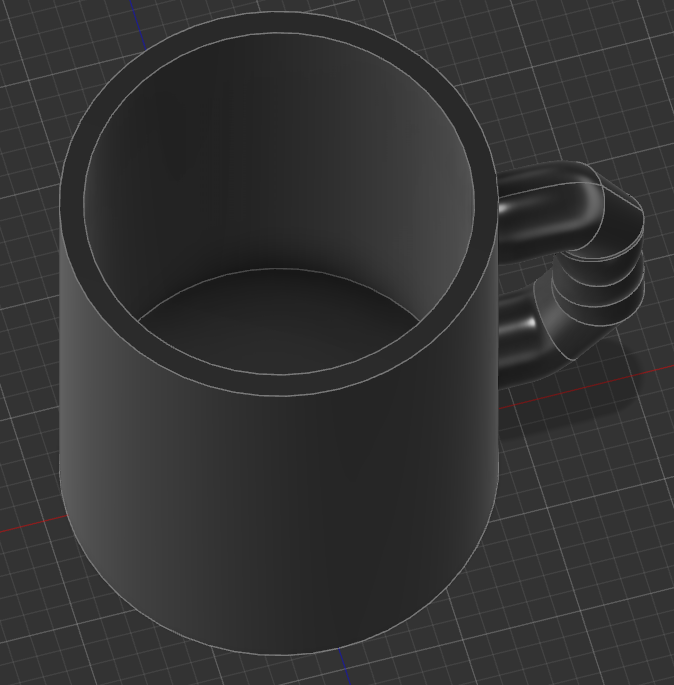
Step 5: Play around with both the faces and the intersections of the mug handle to make your mug as ergonomic or stylistic as possible.
Before you go to the next step, make sure you close the holes at the end of your cylinder. Select the rim (far right picture) then right click and hit close hole. Important: This is the place where the most work will happen with your mug. Its an easy way to learn the sculpt tool. Play around and don't rush this step. Everything else in this assignment is easy peasy, and therefore the handle is where you will be graded the most heavily. |
|
|
|
Once you are happy with your handle, hit Finish Form in the above menu. This will bring you back to the regular menu and tools.
Here is my (admittedly) very terrible version of my handle playing with creases and bevels and basically the tools under the modify skill tree. This took me about 15 minutes to craft, and I expect much more detail and precision from you. |

|
|
Step 6: After you have finished your handle and clicked finished form you should be able to attack your handle to your mug. Move the handle so that the 3d form is inside your mug, but not pushing through. Precision here is imperative.
Youre done. Export to stl, slice, dice and print. |
|
|
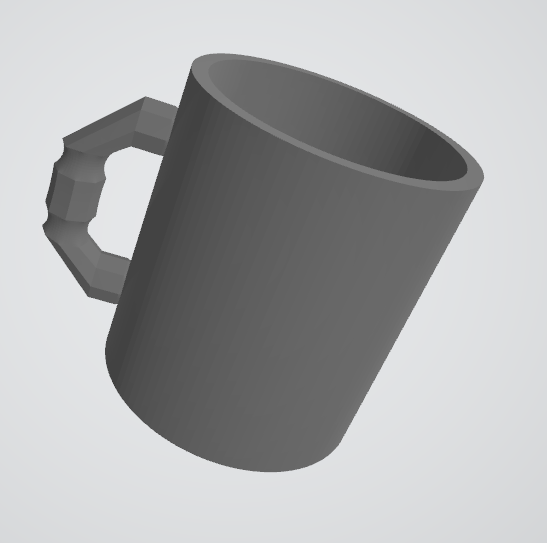
Here is a student exemplar of what you should have:
Credit: Kiara James
|
| ||
Assignment 4: Phone Case
Did you ever want a style of phone case that you couldn't find? well goody do, were gonna be printing the future BOI!
First of all you're going to find the dimensions of your phone.

You're going need to draw the dimensions using the sketch tool in fusion 360.
Then you can proceed with extruding it around 7 mm and adding another sketch 2 mm bigger then your original sketch.
Then you need to extrude the outer sketch to look like this;
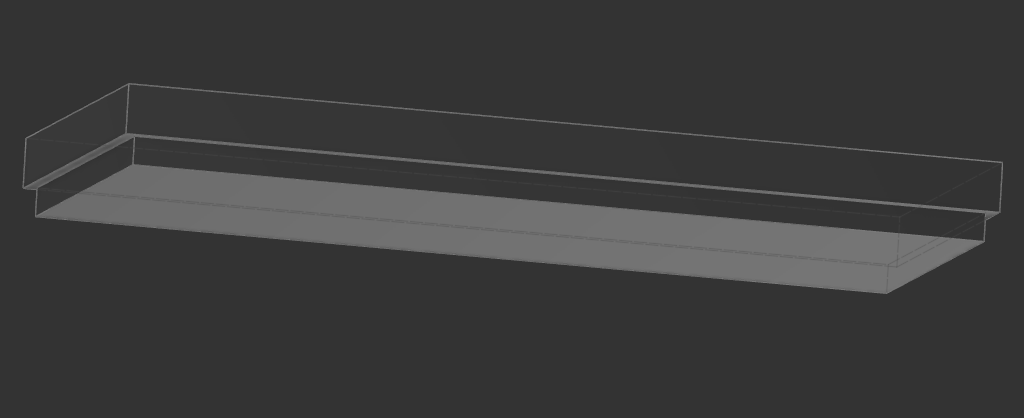
you can extrude the bottom layer to cut the case, just make sure you don't cut off too much and leave a bit of the top.

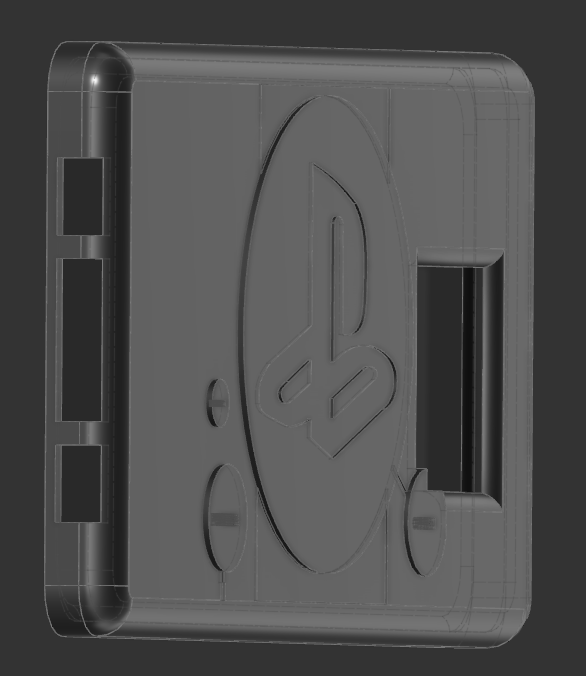
Add an exact sketch of the phone border and extract it by 1 mm and pull the inside sides by 2 mm.

play around with the fillet tool to curve the borders. and add a a design if you want.

For the rest you're going to have to manually measure your camara hole and ports and cut them.
Assignment 5: Free Choice
At this point you should be very familiar with Fusion 360 and have the ability to create whatever might interest you. It might be best to run the idea by MacLean so he can give you perspective on relative difficulty, but the world is your oyster.
