Communication Technology 2055: Web Design 2
Prerequisite: Comm Tech 1055 - Web Design 1
1. develop a multipage Web site
1.1 identify the purpose, audience and audience needs for a Web site
1.2 prepare Web page content that is relevant to the Web site purpose and appropriate for the target audience
1.3 plan the Web site navigation and pages; e.g., storyboarding, thumbnail sketches, site map
1.4 create a Web site according to the World Wide Web Consortium (W3C) standards, including:
1.4.1 pages
1.4.2 text
1.4.3 graphics
1.4.4 basic Hyper Text Markup Language (HTML) tags to set up an HTML document, format text, add links, create tables and build ordered and unordered lists
1.4.5 original navigation bars, rollover images and buttons
1.4.6 image maps
1.4.7 Web page templates
1.4.8 basic cascading style sheets (CSS) to implement a reusable element
1.4.9 importing tabular data to a Web page; e.g., copy and paste
1.4.10 rich media; e.g., video, sound, animation
1.4.11 importing and displaying content from a document and spreadsheet
1.4.12 creating forms
1.4.13 inserting and/or writing code with or without software
1.5 demonstrate knowledge of W3C accessibility standards
1.6 demonstrate project management tasks and responsibilities
1.7 outline tasks and alternative strategies for Web site maintenance; e.g., in-house Webmaster, contract services
1.8 publish site files to a local or remote server and update them when necessary
2. identify copyright restrictions and permissions and put them into practice
3. present the Web site to an audience
3.1 make Web page development decisions based on analysis and interpretation of design specifications
3.2 consider multiple assessments; e.g., after initial creation, revisions, final version
3.3 add the Web site to portfolio
4. enhance Web site
4.1 update data
4.2 modify text and text properties
4.3 modify images and image properties
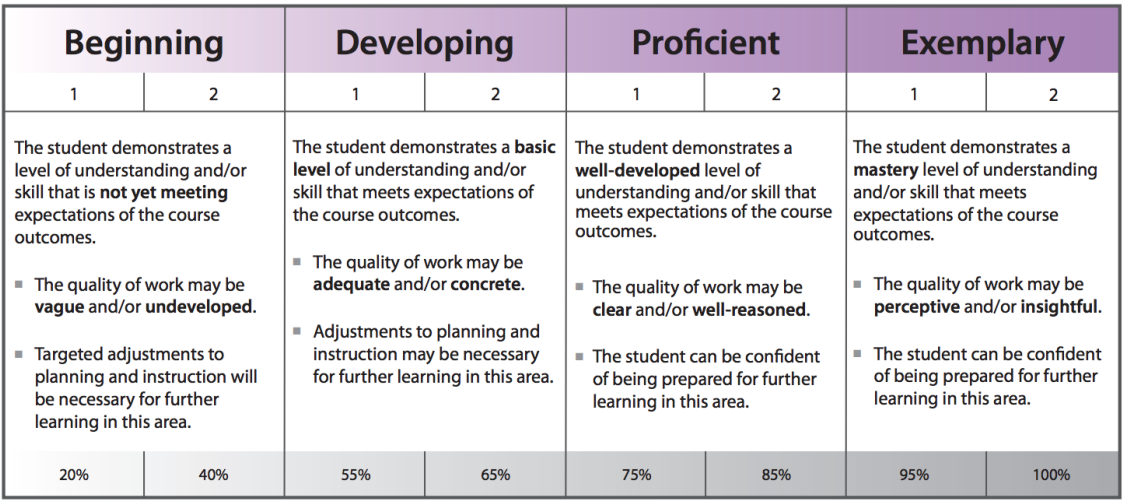
High School Assessment Rubric:
Intro: How are web pages built and, what is the web consortium?
To start, I want you to simply go to this website and take a tool around.
Also! Important website and asset: https://www.w3schools.com/html/default.asp
That website is made by the web consortium and has a ton of tools to be able to code your website.
Also! Important website and asset: https://www.w3schools.com/html/default.asp
That website is made by the web consortium and has a ton of tools to be able to code your website.
Assignment 1: Adobe Dreamweaver Pathing Your Assets and Setting Up Your Site
Websites are just a collection of single pages with links to other single pages in an internal file system. This tutorial will help you set up your root folder and path your images folder so you can start to develop a basic website. This credit is set up to give you some basic html coding knowledge and then in the last assignment, to create your own first multipage website using Adobe Dreamweaver.
Open up Adobe Dreamweaver and follow this tutorial on how to path a folder for Dreamweaver. Follow this tutorial to the 3 minute mark then progress to the next assignment. Important! Path your assets (resources) to your C: drive!!!!. (i.e. the hard drive on your computer)
Open up Adobe Dreamweaver and follow this tutorial on how to path a folder for Dreamweaver. Follow this tutorial to the 3 minute mark then progress to the next assignment. Important! Path your assets (resources) to your C: drive!!!!. (i.e. the hard drive on your computer)
Assignment 2: Create a Header in Adobe Dreamweaver
After your asset folder is created, you are ready to start building.
|
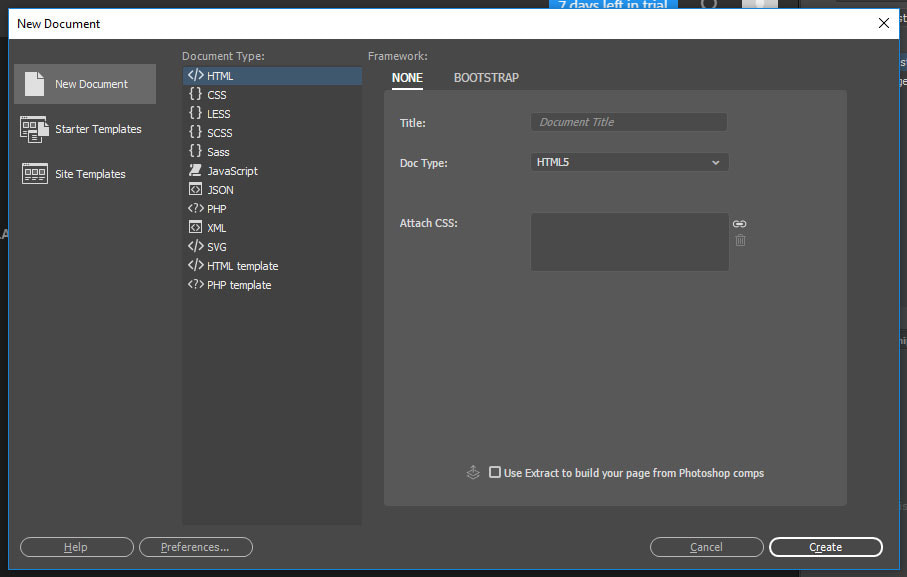
Step 1: Create a homepage:
Go to File > New Choose html and title your webpage |
|
|
You will notice that dreamweaver has both a live site view and html pre loaded at the bottom.
|

|
|
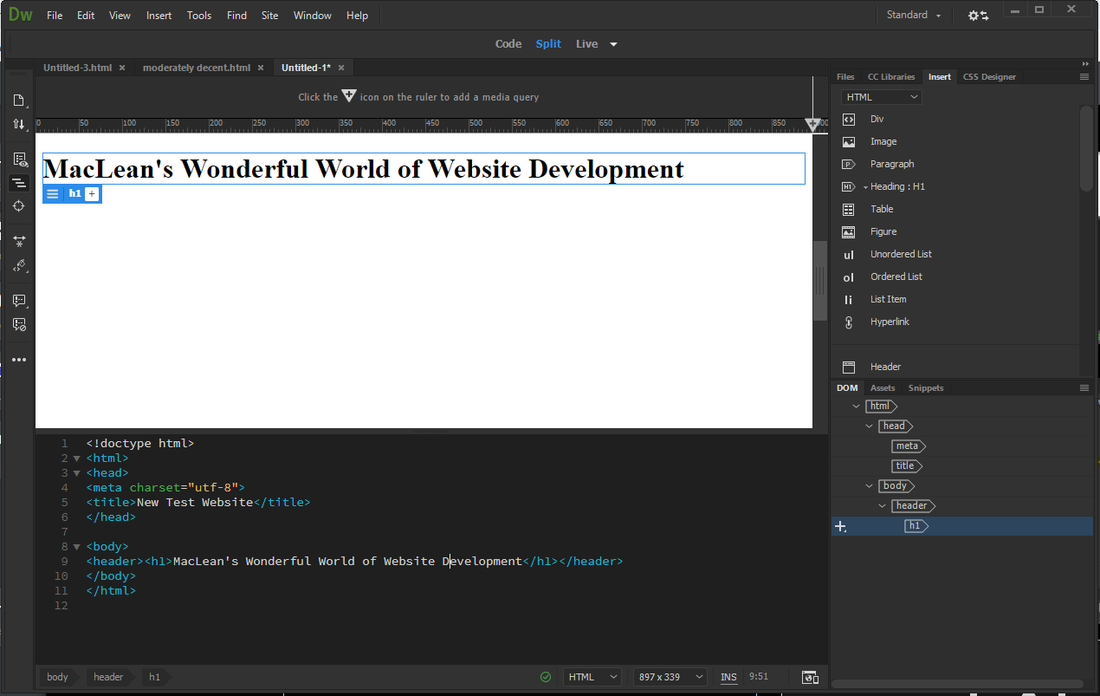
Step 2: Insert a header into your webpage. Click in you live site and go to the right and click and hit Insert tab in the upper right hand corner. Then click header.
|

|
|
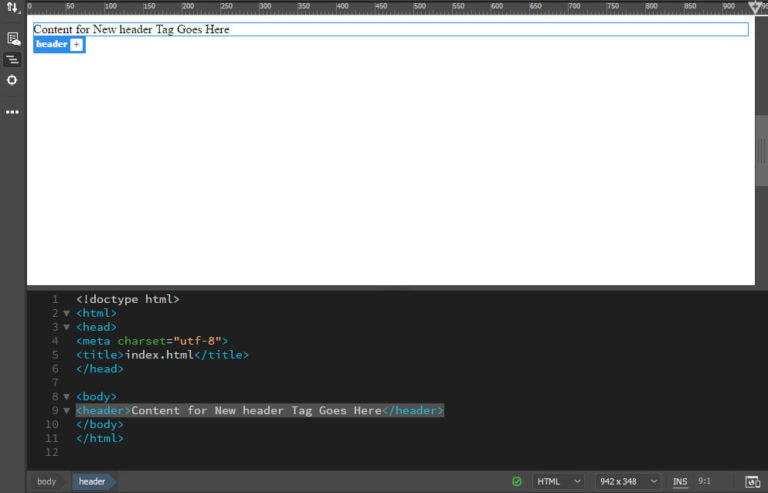
This is what you should see... Now you have to change the heading in the html at the bottom... you should be able to see where it gets highlighted.
|
|
|
Step 3: Next, go to the html and highlight the text for your header.
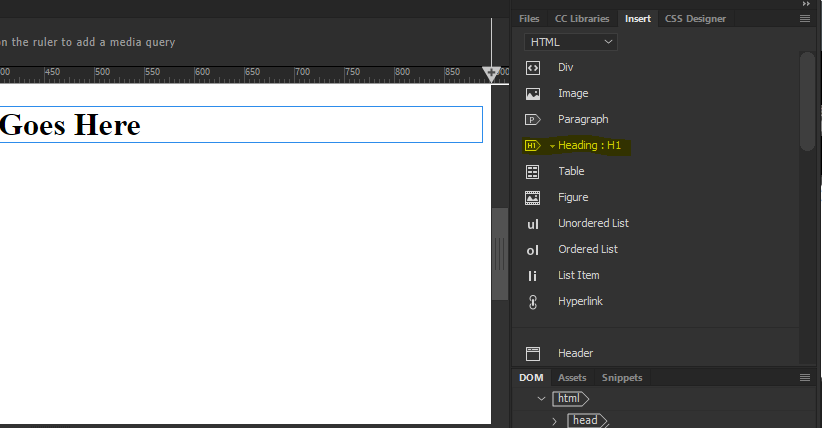
Then, go back up the the HEADING (NOT HEADER) in the insert menu and click the small drop down arrow and choose h1. This wraps the page title into an HTML tag. |
|
|
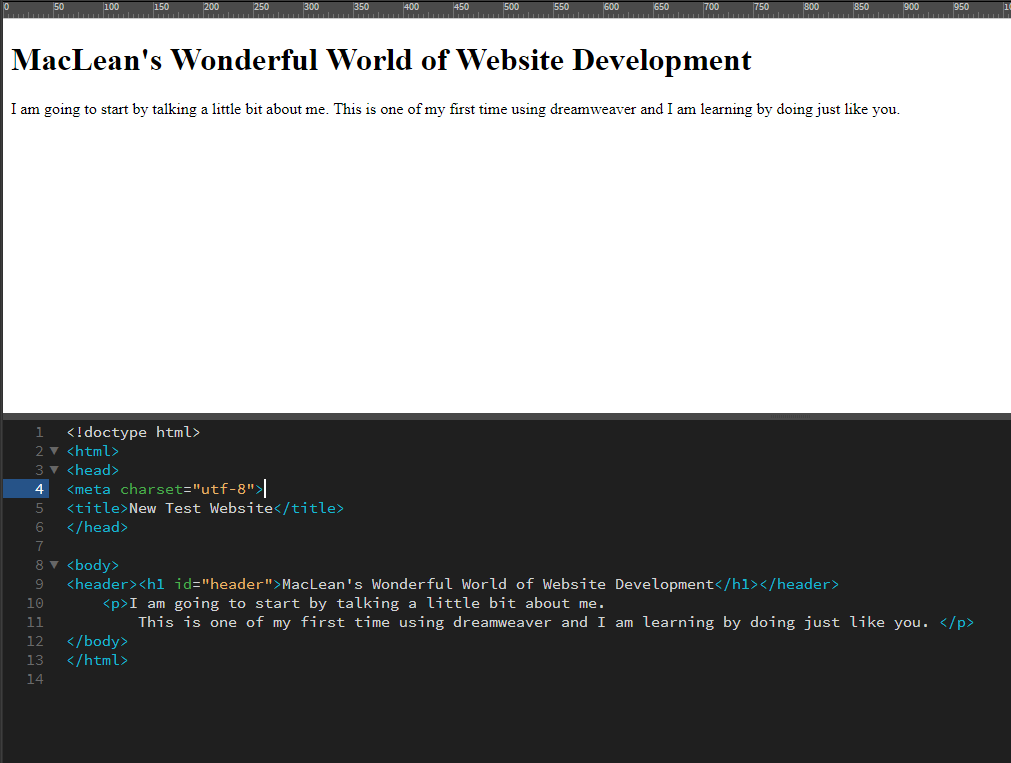
Step 4: Now you can go down to the html and change the text that you highlighted to what you want the title of your webpage to be.
Youve just made a header! Congratulations! |
|
Assignment 3: Paragraphs and some Formatting Rules
|
The basic format for this tutorial comes from this page:
https://www.w3schools.com/html/html_paragraphs.asp Step 1: First thing we want to do here is start with a <p> (p is a tag for paragraph) on line 10 just under your header. You will notice that dreamweaver closes your paragraph off for you automatically and all you have to do is now type in between the two p's. Type something, you will need at least 2 to 3 sentences. Particularly notice that even though I hit enter in the html down below, the top didn't format the same way. Because html is made to be used over a variety of different screen sizes, we cant format as wysiwyg (what you see is what you get), and we need to use formatting tools. |
|
|
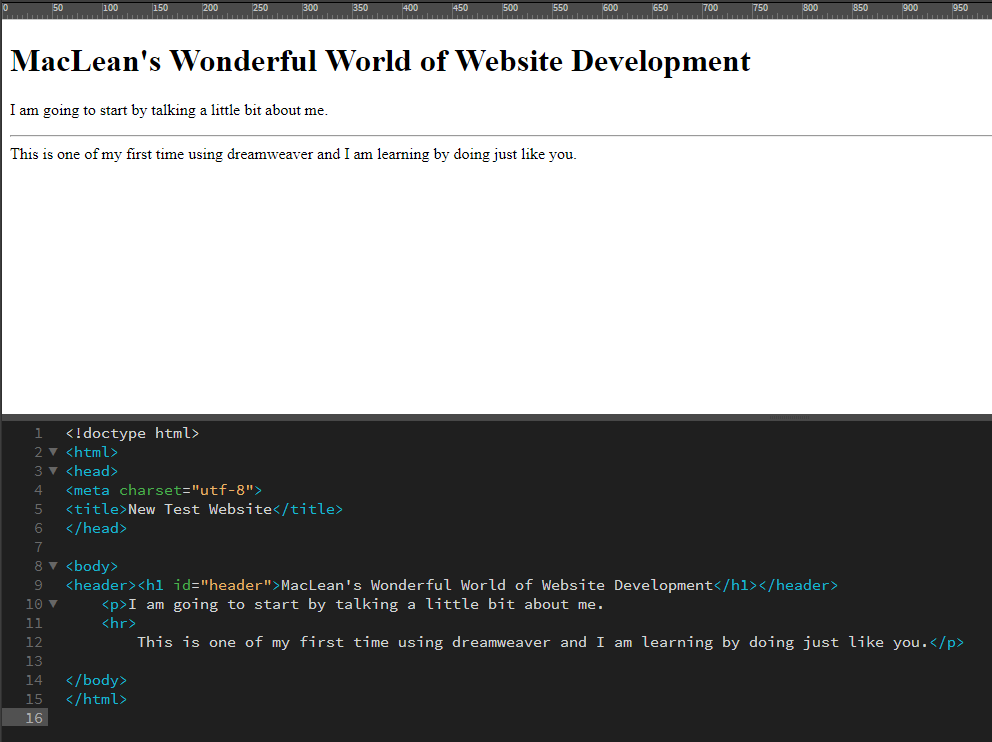
Step 2: Try using some formatting tools. We will start with a Horizontal Rule or <hr> (another tag) . Hit enter after line 10 and insert a <hr> on line 11 to get a horizontal rule between those two lines.
|
|
|
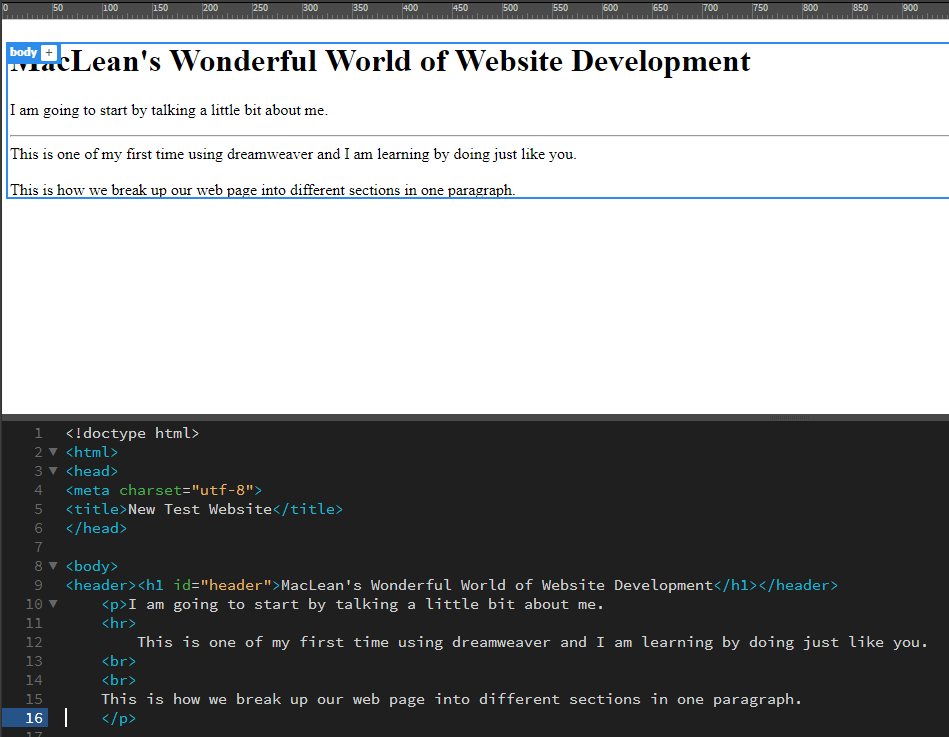
Step 3: This time I want you to insert a Line Break <br> after your last line of text in your paragraph. Then put in another <br> on the next line. Your code should look like this when you're done. Notice how the text formatting on the bottom (where it starts and where it ends, spaces, etc, has no effect on how it appears up top?
|
|
|
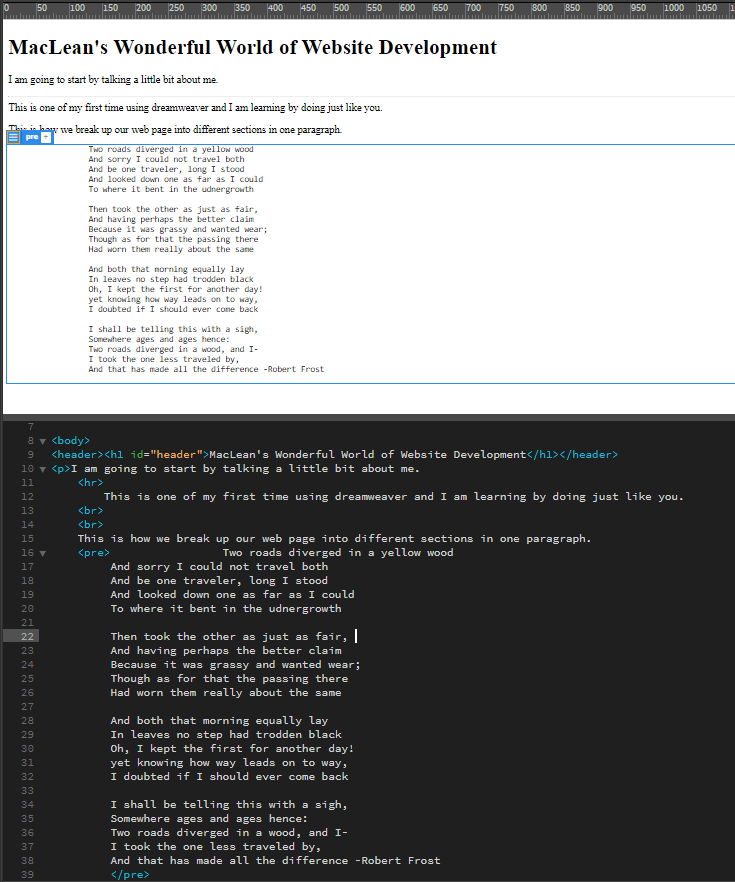
Step 4: lets figure out a way to use formatting in our code and have it appear in our website. The way we do this is using the <pre> tag. Lastly for this assignment I want you to copy and paste, a poem you enjoy or have written. I want to use a poem because they have specific formatting. Lets give this a try.
See how pre keeps your formatting true? Awesome. Assignment 3 done. |
|
Assignment 4: Tags and Attributes
|
We are going to use inserting images and links to learn about tags and attributes. We have already been working with them, but lets make sure we have some common terminology going forward.
Step 1: Inserting an image. This one is easy and there are a couple of ways to do it. First way is to go up to the menu on the top right hand corner of Dreamweaver and find the insert menu. You will need to have the line in the html selected in which you want to put the picture. Insert a picture you choose. Remember when you pathed your images folder in the first 3 minutes of the first assignment? Make sure you sure you use the pathed images folder, otherwise, when we eventually upload your website to the net, all links to images will break and it will be a huge mess trying to relink them. |

|
|
Step 2: Now that you have your image in, and an example of what you should be putting in, I want you to do two things:
1: look at the html of what the image is and recopy it to the line underneath it. Important: type it out! do not ctrl c ctrl v it. I want you to play attention to the code. i.e. <img src=" once you get to the equal sign, Dreamweaver should prompt you to browse for a file. Select the file. <img> is an tag, it tells the webpage what is about to be sourced src= is an attribute it tells the webpage where to go to find the tagged file |

|
2. Next, I want you to continue copying out the image line, paying close attention to width and height numbers. change the numbers to random numbers and see how it updates on your images. Finish up and see if you can get your image to manually appear. I want to see you guys tile at least 4 images of different images.
width= is an attribute that tell the website how wide you want the picture to be displayed
height= is an attribute that tells the website how tall you want the picture to be displayed
alt= is an attribute that tells the website to what to display if the original asset cant be displayed
width= is an attribute that tell the website how wide you want the picture to be displayed
height= is an attribute that tells the website how tall you want the picture to be displayed
alt= is an attribute that tells the website to what to display if the original asset cant be displayed
|
Step 3: Now that we understand some attributes and how to path them, lets try to embed a link to your favorite website:
The <a> tag denotes a hyperlink the <href> denotes a website link Take a look at the coding and try to make your own website link work. |

|
Lets finish by learning a simple technique to embed a link into an image file. Super easy, lets start here.
https://www.youtube.com/watch?v=F02gveYAnt4&ab_channel=RayPastore%2CPh.D.
https://www.youtube.com/watch?v=F02gveYAnt4&ab_channel=RayPastore%2CPh.D.
Assignment 5: Multi Page Website. Bringing it all together.
Now that you are introduced to basic structures and html, lets take it further with this final tutorial: This tutorial is brilliant and will basically teach you everything else you need to know about how to build a multi page website.
https://www.youtube.com/watch?v=2pB6lBuvGxQ&ab_channel=Jong-YoonKim
https://www.youtube.com/watch?v=2pB6lBuvGxQ&ab_channel=Jong-YoonKim
| images-20230315t174536z-001.zip |
Couple notes for this tutorial
1. You will need the assets in the zip file above.
1. The way the tables work are slightly changed. You can choose to insert the next variable after the table now instead of pressing enter and going down.
2. Image map is only present in the properties box in design view (basically, dont confuse design view with live view, properties isnt the same in live view)
Last Thoughts and Practice:
Here is where you modify your website by yourself. You should be able to manage some extra tutorials and w3 practice to make your website better than just the basics I have provided you today.
Getting some of your text formatted with colour, size, bold etc, give these html tutorials a go:
Styles:
https://www.w3schools.com/html/html_styles.asp
Text Formatting (bold, italics etc):
https://www.w3schools.com/html/html_formatting.asp
Text Colours:
https://www.w3schools.com/html/html_colors.asp
