Communication Technology 1145: Animation 1
Prerequisite: Com Tech 1005 - Visual Composition
Outcomes:
1. identify and describe the fundamental concepts of the illusion of movement through a minimum of three animation styles used in the animation industry;
e.g. cel animation, claymation, pixilation, computer animation
2. produce short animation assignment(s)
2.1 prepare a project plan, an outline and/or a storyboard for a presentation
2.2 select an appropriate animation technique; e.g., clay, film and artwork, digital proofs, computer animation software
2.3 use technical equipment; e.g., camera/image-capture device, computer, editor, to capture/create images, create movement and edit final product(s)
2.4 identify and/or apply music and/or sound effects to enhance the production
2.5 present the project to teacher and/or peers for feedback
3. identify copyright restrictions and permissions and put them into practice
4. present a selection of work completed in this course to an audience
4.1 discuss work regarding:
4.1.1 how the elements and principles of design help facilitate good composition in his or her work
4.1.2 the technical and creative aspects of the work; e.g., quality, uniqueness
4.1.3 areas of concern/difficulty (if applicable)
4.1.4 the use of tools and equipment
4.1.5 the relationship of the short outline/script to the final product
4.1.6 the quality of completed project
4.1.7 meeting school and community standards; e.g., appropriate language
4.2 participate in peer/teacher assessment
4.3 add this selected work to an ongoing portfolio
High School Assessment Rubric:
Assignment 1: Frame by Frame Animation
Here is a basic Adobe Animate (flash) tutorial to give you the basic features and controls.
https://www.youtube.com/watch?v=JDU93AbRs-o
Here is a 1 hour and 42 minute tutorial regarding all of Adobe Animate. It is by a professional artist and youtuber Jazza. Highly recommend, all hour and 42 minutes is gold.
https://www.youtube.com/watch?v=3iXSQ8VcPcU
3 Ball Animations
This will be your first Flash animation project and the purpose of it is to give you the confidence to try harder and more challenging animations. We start simple, so if you are worried about falling behind, don’t, this is meant to be fun and enjoyable! As you gain skill and confidence, you can attempt increasingly challenging animations.
Hot Keys you need to know
[F7] This adds a new BLANK key frame
[F6] This adds a new key frame which COPIES the one before it
[F5] This extends the previous frames, which can slow down your animation if it’s too fast
Your Assignment
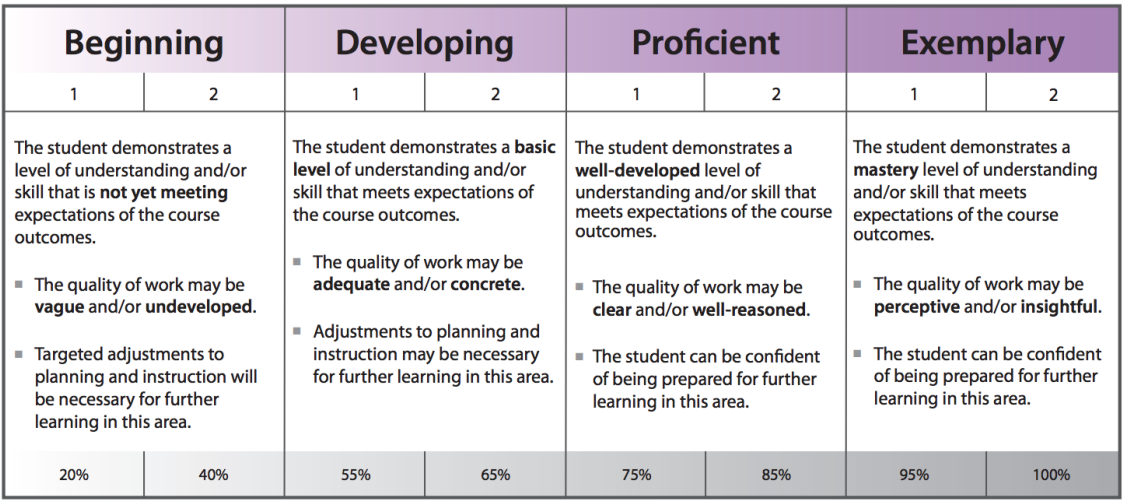
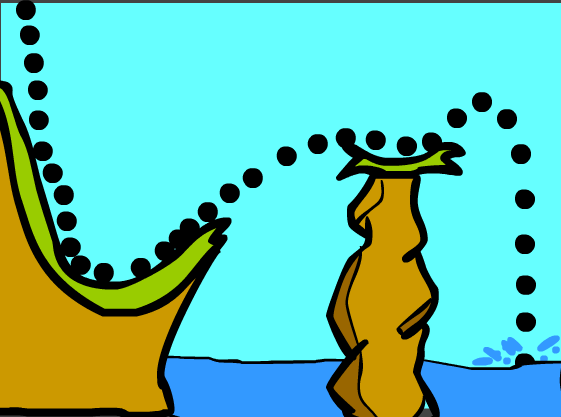
You must make 3 separate ball animations which show a ball as it rolls up and down an environment that you designed.
Ball Animation 1: Your first animation will likely be quite simple as you are just learning these procedures.
Basic Instructions:
1. Add 50 blank keyframes
2. On the first keyframe, draw a ball
3. Find the onionskin button (just above the frames) so that you can see previous frames less opaque
4. Copy the ball from the first frame to the second but slightly moving the position
5. Repeat this process for the next 50 frames
https://www.youtube.com/watch?v=JDU93AbRs-o
Here is a 1 hour and 42 minute tutorial regarding all of Adobe Animate. It is by a professional artist and youtuber Jazza. Highly recommend, all hour and 42 minutes is gold.
https://www.youtube.com/watch?v=3iXSQ8VcPcU
3 Ball Animations
This will be your first Flash animation project and the purpose of it is to give you the confidence to try harder and more challenging animations. We start simple, so if you are worried about falling behind, don’t, this is meant to be fun and enjoyable! As you gain skill and confidence, you can attempt increasingly challenging animations.
Hot Keys you need to know
[F7] This adds a new BLANK key frame
[F6] This adds a new key frame which COPIES the one before it
[F5] This extends the previous frames, which can slow down your animation if it’s too fast
Your Assignment
You must make 3 separate ball animations which show a ball as it rolls up and down an environment that you designed.
Ball Animation 1: Your first animation will likely be quite simple as you are just learning these procedures.
- Simple animations, try to control the speed and direction of the ball
- No background necessary, focus on the animations.
- Attempt to throw in some squash and stretch as well as arcing
Basic Instructions:
1. Add 50 blank keyframes
2. On the first keyframe, draw a ball
3. Find the onionskin button (just above the frames) so that you can see previous frames less opaque
4. Copy the ball from the first frame to the second but slightly moving the position
5. Repeat this process for the next 50 frames
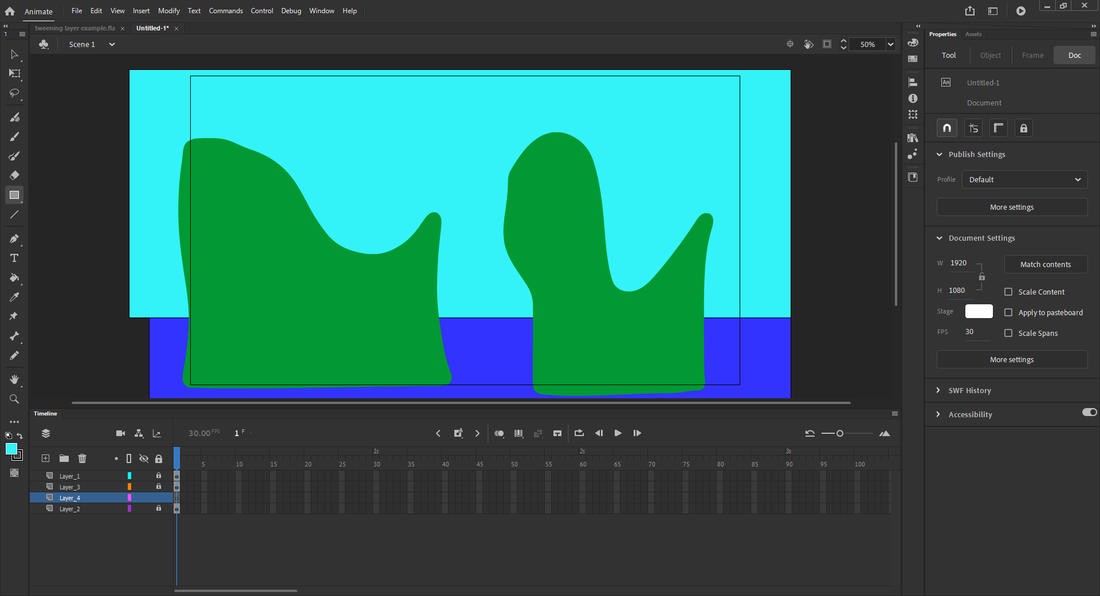
Ball Animation 2: Now we add a background and some slopes which we can use to demonstrate speed and weight.
Basic Instructions:
Use the layers button to create a static background tat your ball moves through. Layers work almost exactly like photoshop and illustrator, but with frames.
- Scene must be coloured
- Ball must travel a more complex route
- Interact with and effect other objects
Basic Instructions:
Use the layers button to create a static background tat your ball moves through. Layers work almost exactly like photoshop and illustrator, but with frames.
Ball Animation 3: For your final animation, I want you to pull out all the stops and show me what you can do!
Basic Instructions:
Make a layer that is on top of your background layer that has frames. Have that layer move as well as the ball.
- Add other animated objects like tentacles, barrels that move, other balls, etc.
- More complex background
- Change size of ball to show depth
- Principles of animation
- Be creative!
Basic Instructions:
Make a layer that is on top of your background layer that has frames. Have that layer move as well as the ball.

Credit: Dapne Nelson
|
Credit: Derek Beebe
|
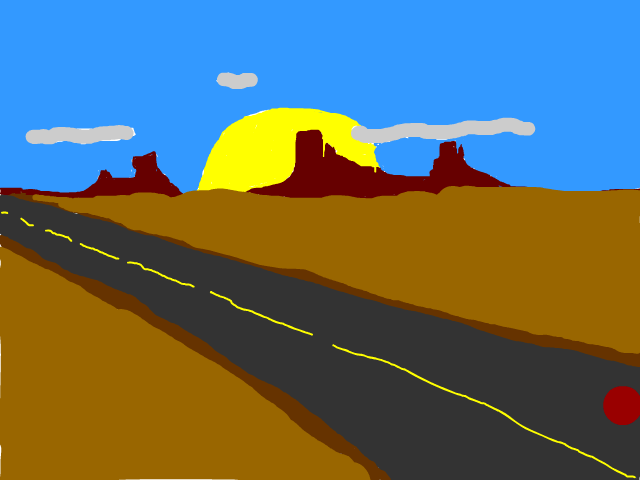
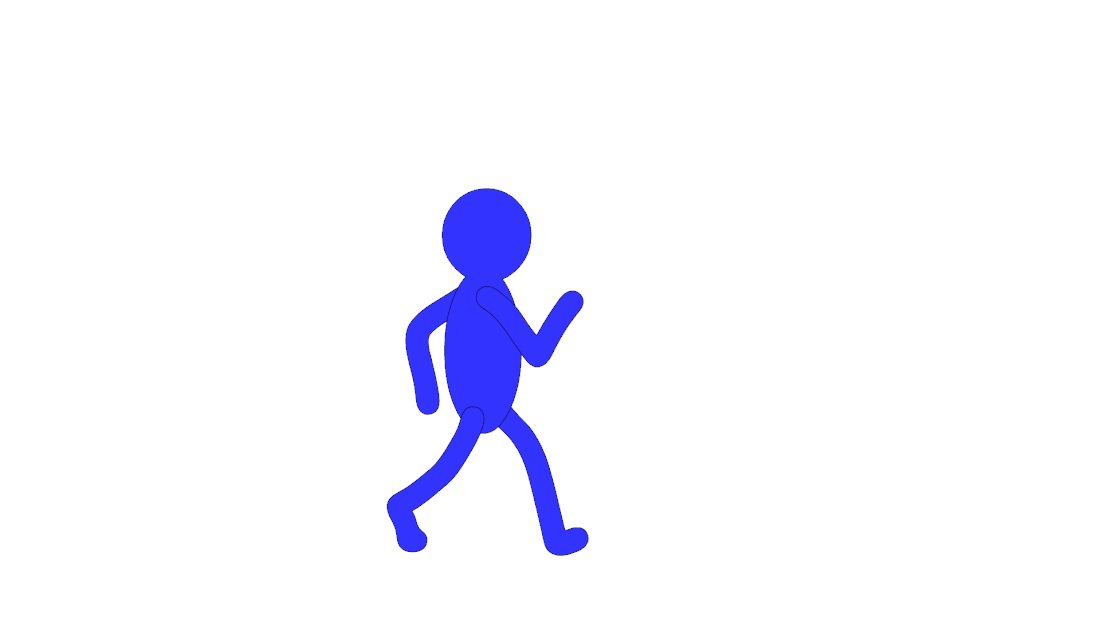
Assignment 2: Walking Stickman
In Flash and other animation programs it is often easiest to simply draw each frame in your animation one by one. Although this may sound like a lot of work, it gets easier with more practice. Since we are just starting out with animation, I want us to focus on a very simple stickman. Use the tutorial link below to watch a brief video explaining certain animations you can do with a stickman. Start the video at 2 minutes as the narrator explains some stuff at the beginning that is not necessary for our class.
Tutorial: https://www.youtube.com/watch?v=wNzjC_6qk-8
We will need the next graphic to copy onto our animation.
Tutorial: https://www.youtube.com/watch?v=wNzjC_6qk-8
We will need the next graphic to copy onto our animation.
|
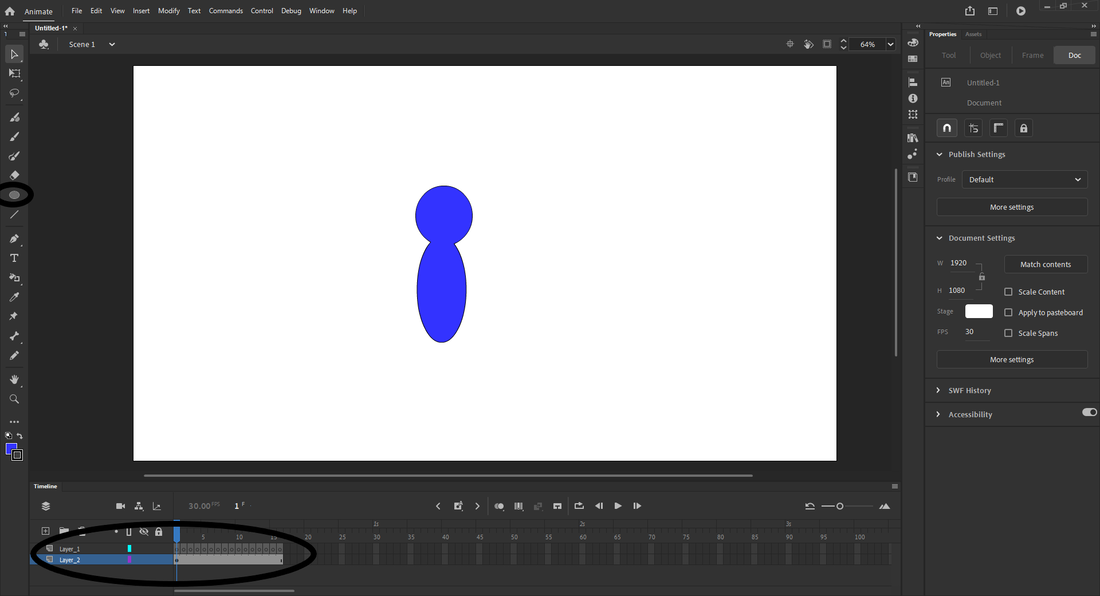
1. We are going to need 9 keyframes. Hit F6 at least 9 times in the timeline to get the frames you will need. Next, lets add a new layer. You will notice that the new layer has an extended keyframe. On this layer at the beginning we want to draw the basic head and torso of the character without arms or legs. Will add the arms and legs later. I just drew two ovals with the oval tool and then used the free selection tool to move them on fop of each other. Remember that much of the drawing in this program is similar to adobe illustrate. This is vector graphics, but sped up to make it easier and quicker to draw to animate. The extended keyframes are for things that persist through the animation, i.e. the head and torso.
2. We are going to go a little bit detailed on the layers here to start to get an idea of what a simple animation with a lot of moving parts will start to look like. Add 4 more layers, and label them
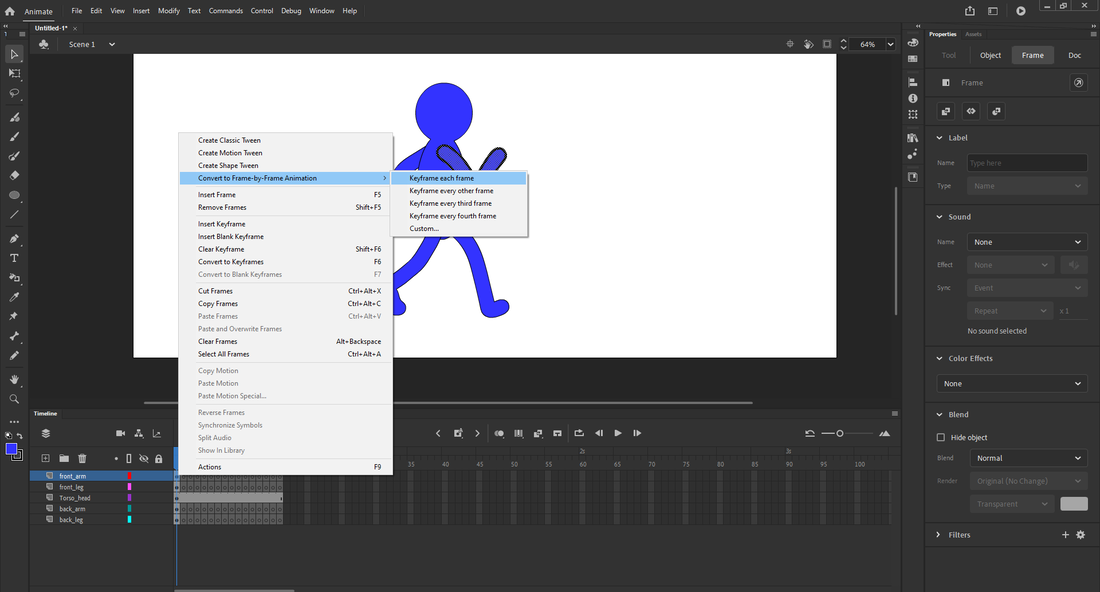
Front Arm Front Leg Back Arm Back Leg Arrange them as you see on the example on the right. Then. Right click on each layer and convert them all back to keyframes. This will give you everything you need to make the rest very easy. 3. Go back to frame one and begin drawing the arms and legs on the appropriate frame. For each frame do the next part of the walk cycle. i.e. contact, recoil, passing, high point etc.
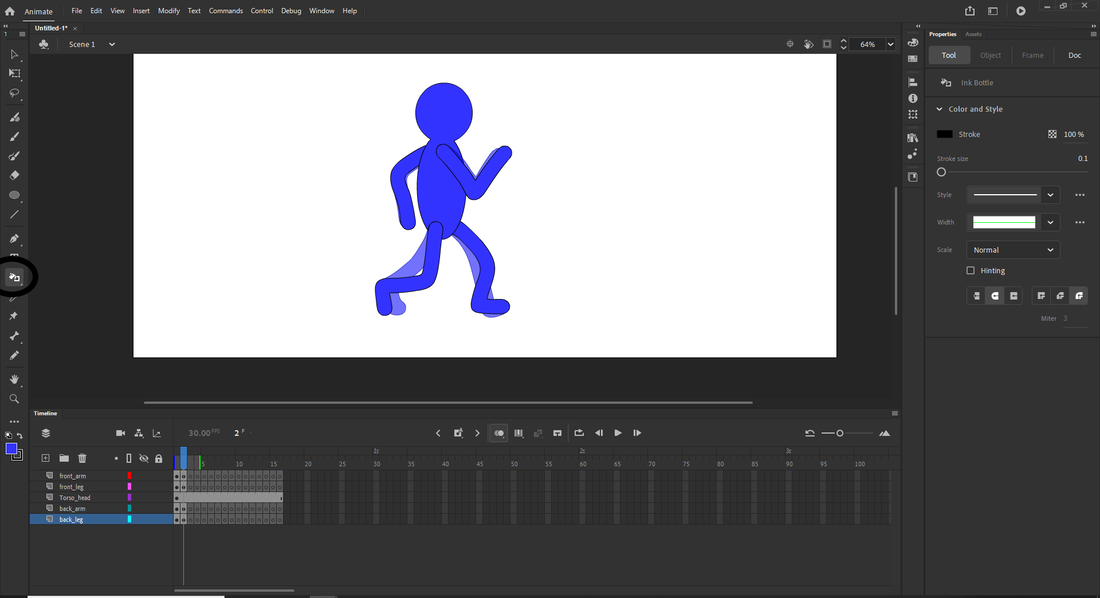
Use the brush tool to draw the arms and legs and then use something called the ink bottle tool to outline your strokes. So I used a brush with a blue fill and then used the ink bottle to outline the blue fill strokes. This way your stick figures dont get lost on top of themselves. |
|
|
4. Keep drawing the arms and legs, dont forget onion skin to keep your proportions correct. I found that it was easiest if i did all the painting and then went back and used the ink bottle afterwards so I didnt have to keep changing tools. Go through all 9 phases of the walk cycle.
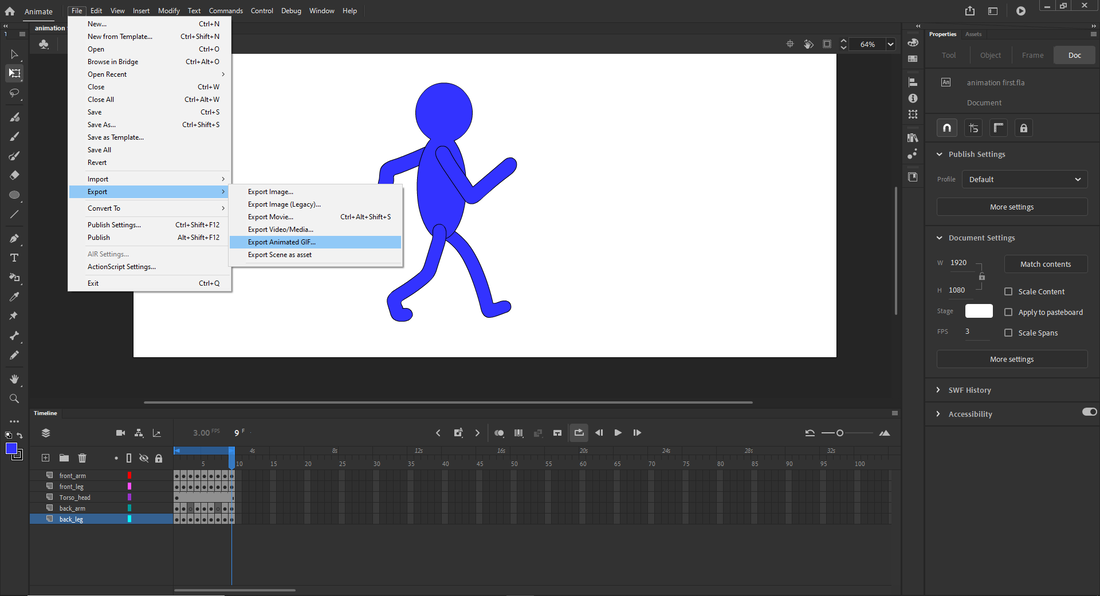
I exported as a gif and got this as a result. But its too fast... so lets slow down the framerate. I can also tell I didnt ink bottle everything. So I went through and cleaned it up. 5. I changed the framerate to 3 fps for this one... and I also went through and started to adjust the legs and porportions and where they hit to make the walk more natural. I exported this to a gif as well.
|

|
|
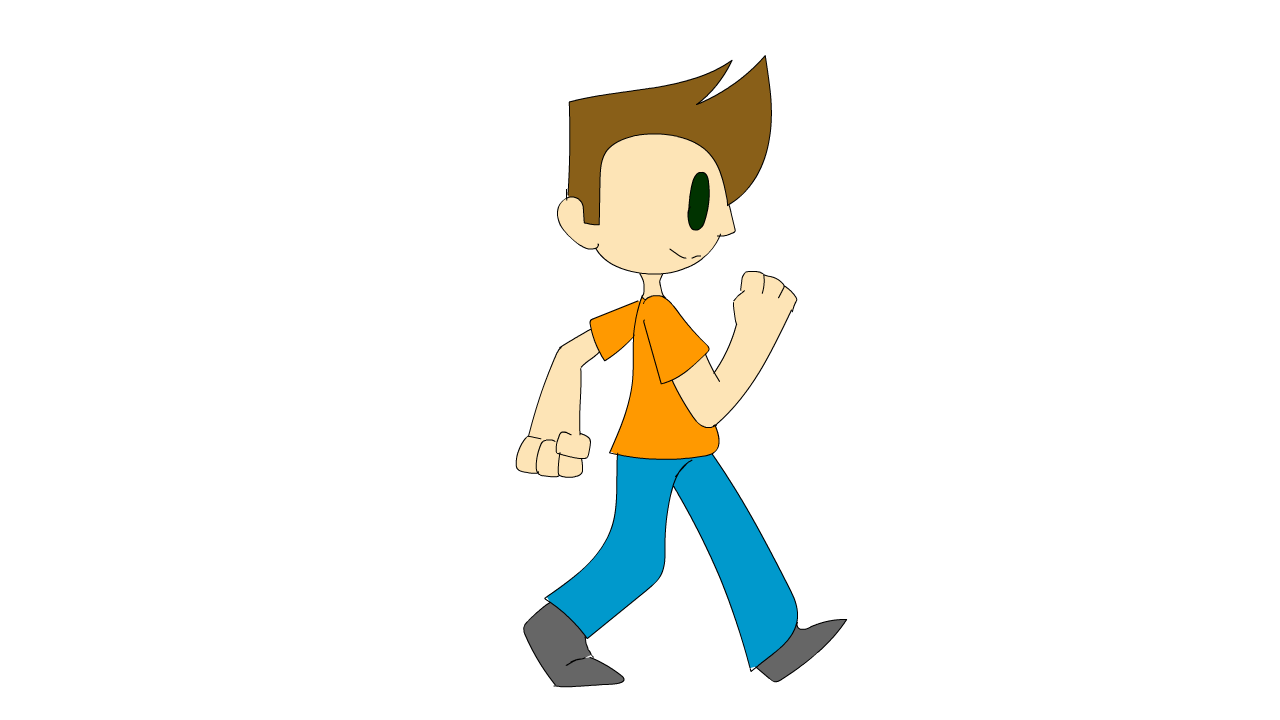
This is something we should be getting at the very end. The clear swing of the arms and the circles of the legs. Clear layers and animation. This is however the most basic I expect you to come up with. You can take this very much further.
|
|
Here is another student made example of approximately what you should be coming up with.

Credit: Caleb Dobranski
|

|
Credit: Riley Shea-Paston
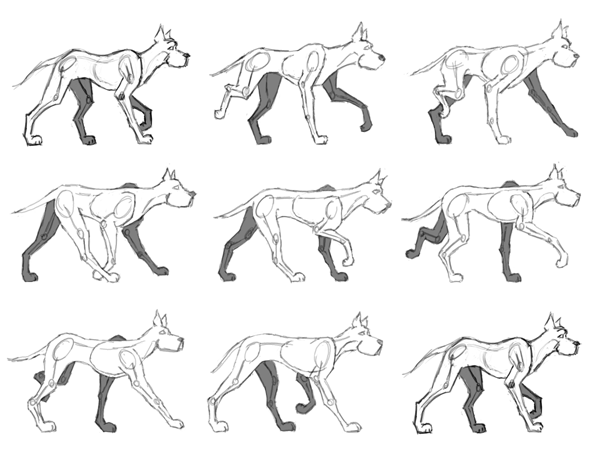
Bonus Marks: Try a quadruped animation.
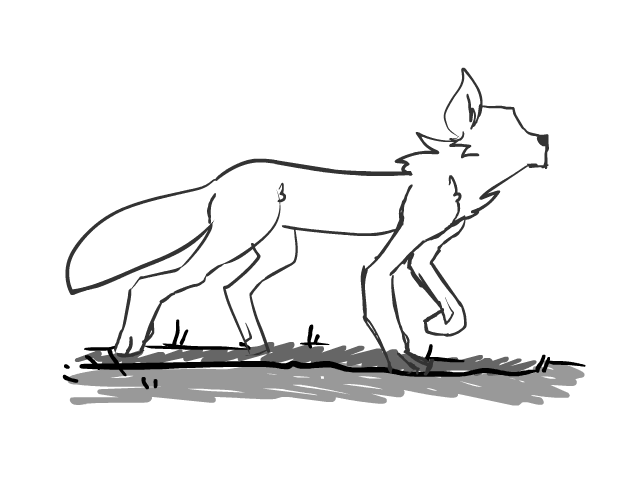
Credit: Livia Suppes
|
|
Assignment 3: Introduction to the Tween
Now that you know the basics of layers of frame by frame animation, its time to get into some more advanced stuff, like pathing an object through space and frames using tweening.
https://www.youtube.com/watch?time_continue=15&v=X6rkRBfF4J0&feature=emb_logo
https://www.youtube.com/watch?time_continue=15&v=X6rkRBfF4J0&feature=emb_logo
|
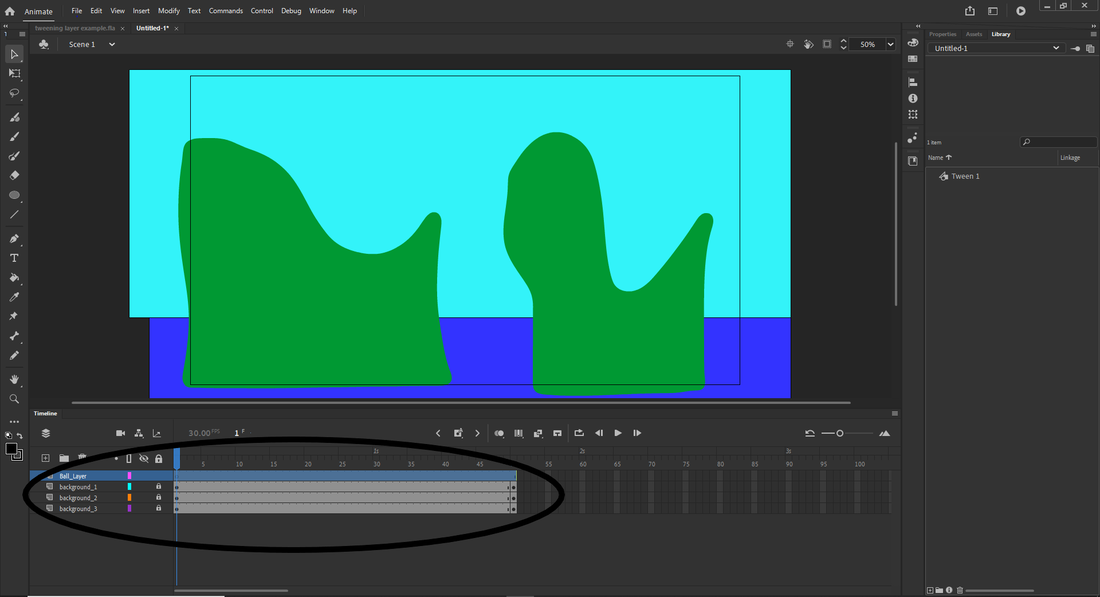
1. How to tween. Lets use the same ball example as assignment one, only with a tween this time. Make a very simple background. You will notice, i dont pay much attention to lines outside of the background. That is because when we export (render) this animation, only the artboard will show up. This is the importance of choosing the correct artboard.
2. On the new layer you created, hover over the first frame until you see a rectangle. Click and drag out to about 50 frames for the motion tween. Do the same for your backgrounds.
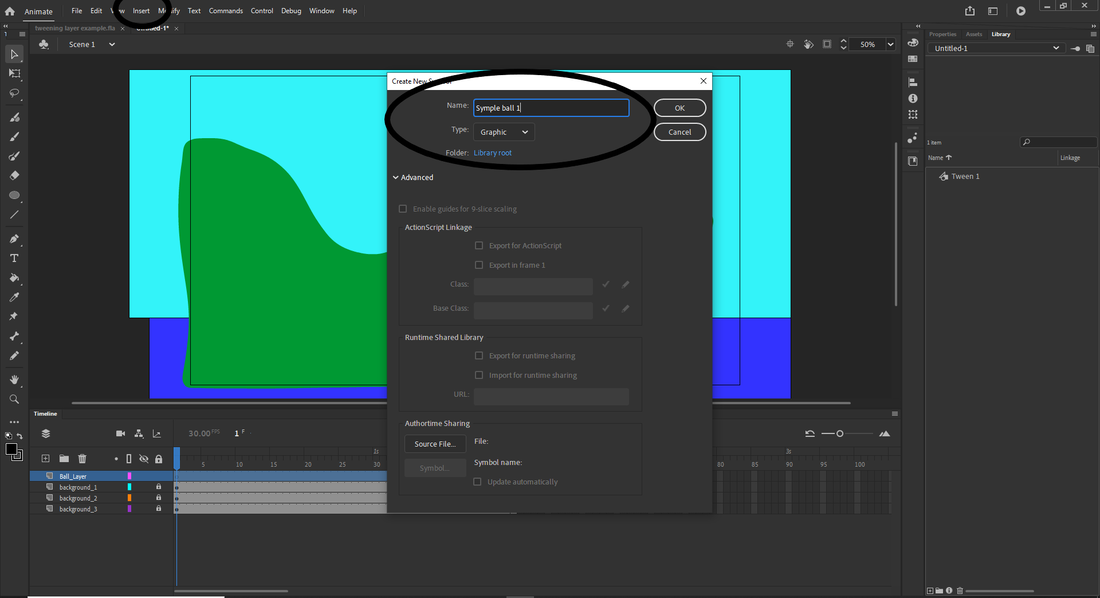
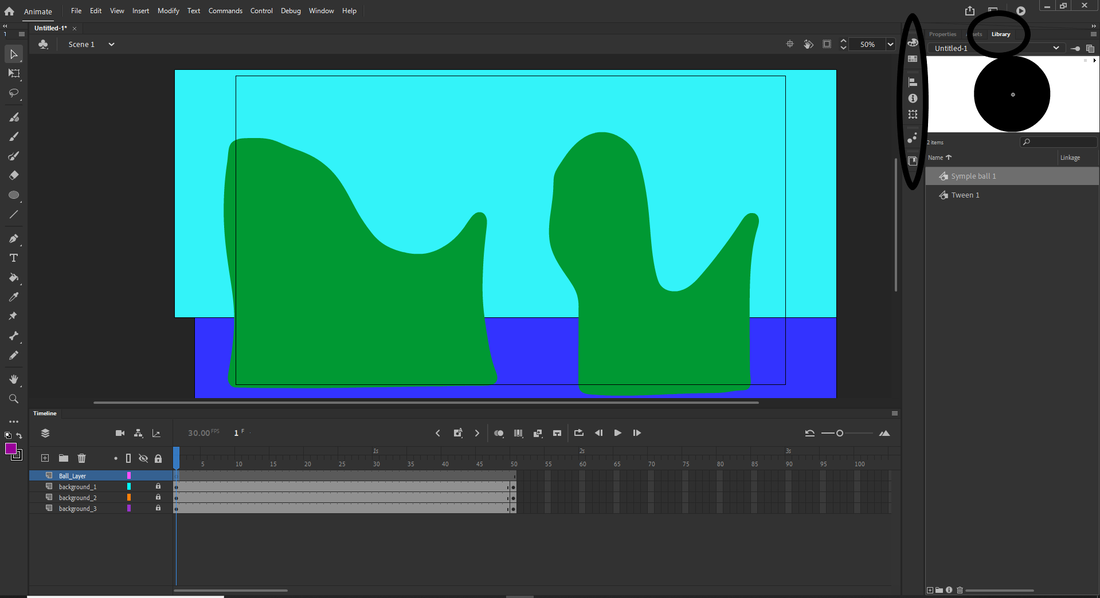
3. We can only tween with symbols. So we need to go to the insert menu and add a new symbol to our animation. Lets name it simple ball 1 and make sure we choose graphic. This will let us use this resource from our library from now on.
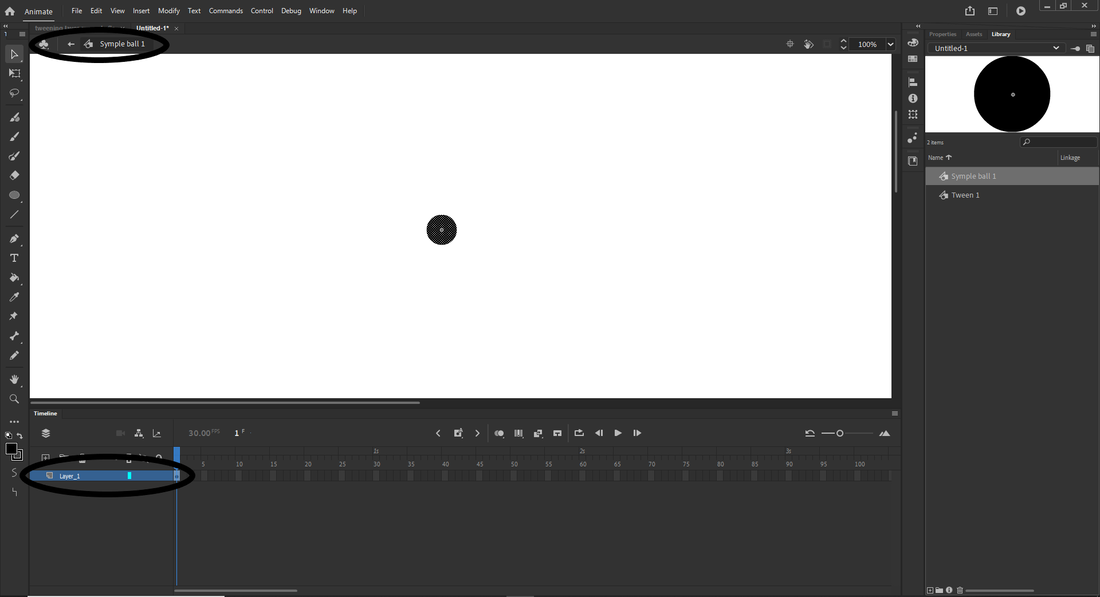
4. When we click okay, it goes to a blank canvas. This is where you will craft your symbol. While this symbol is quite simple, symbols get quite complex and can be used to make very complicated animations, and are used in web design as well.
Draw a simple sphere that has a fill. You will notice that symbols have both frames and layers. We will be using these in later years. Because I always like to challenge myself, I added frames and changed the colour of the ball over 10 frames. Hit the back button that is circled in the example to go back to your main animation. You now have an asset in your library. 5. Find your library and drag it to one of your tabs. This will allow you to drag assets into your animation. It is normally in the menu circled on the right. I would drag it to a tab in your properties menu. This will allow you to drag your symbol into your animation.
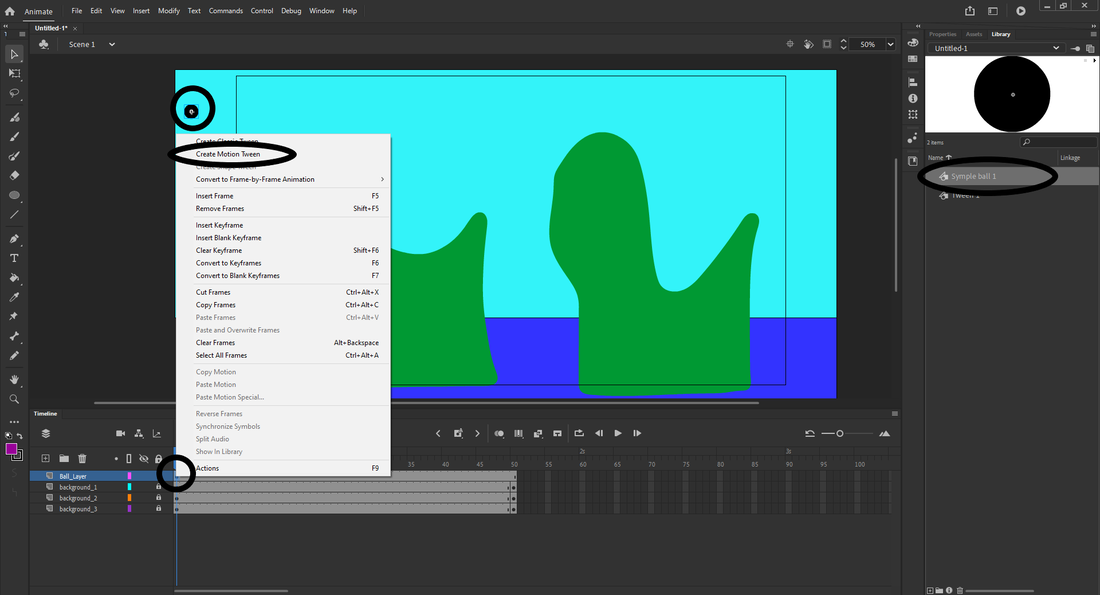
6. Drag your ball from the library to where you want your motion tween to start. Make sure you have the first frame of your ball layer selected. Click, create motion tween with your symbol and frame selected. You should see your whole animation bar turn yellow. This means your tween is active.
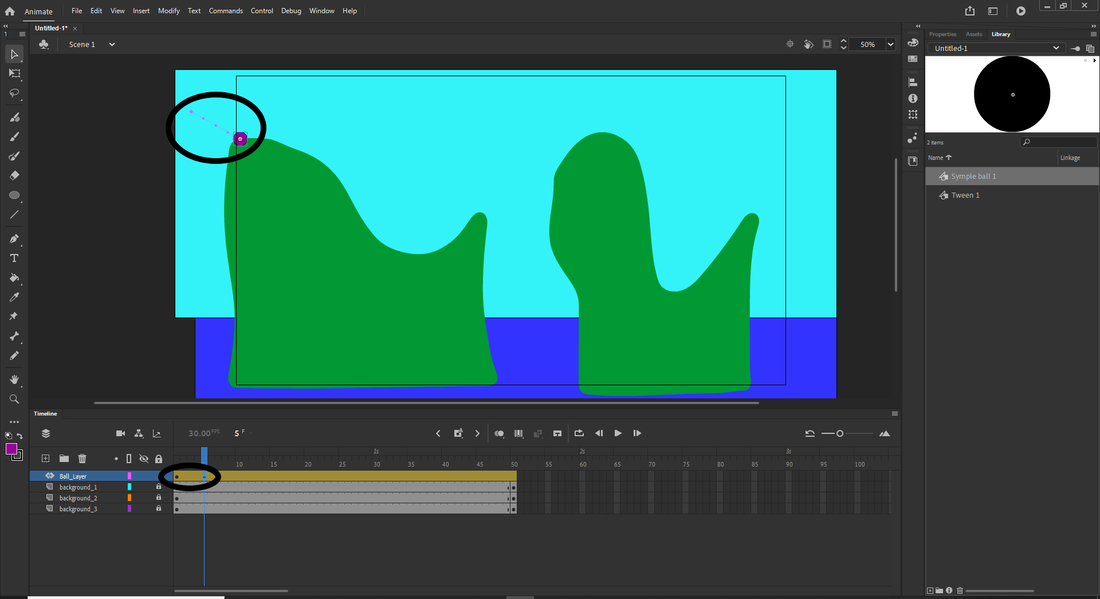
7. Select the how many frames you would like to move the ball. For me, I will go by 5s, as it will make it more manageable. So I select frame 5, then I select my ball and move it where I want it to go in 5 frames. You can now mess with the tween. The dots represent frames, you can change the curve or the arrangement of the tween. Click 5 more frames and click and hold the ball to the next position.
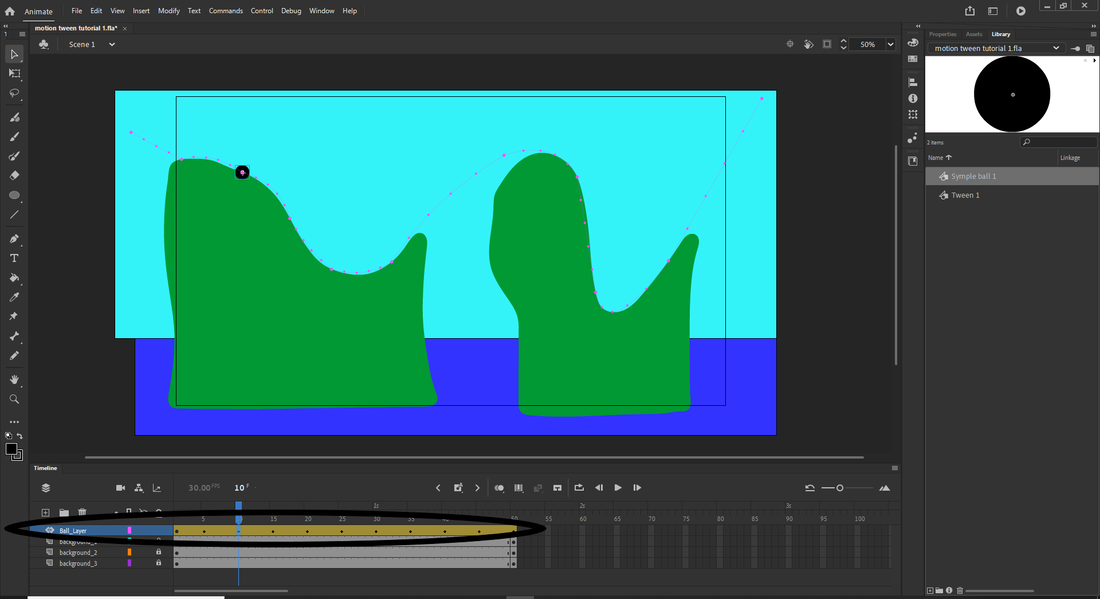
8. Once you have the basic path finished you can start messing with the individual frames. You can curve and stagger the frames as you please. Mess around with the controls. Move the ball to exactly what you want.
9. Export it as an animated gif. Hand in all your files.
|

|
Assignment 4: Free animation
Now that you have the hang of rudimentary animation, use the skills you have developed so far to make a 5 second animation. The subject matter is yours to construct. It can be colours or shapes.
Here are a few examples of student made free animations:
Here are a few examples of student made free animations:
Credit: Caleb Dobranski
|
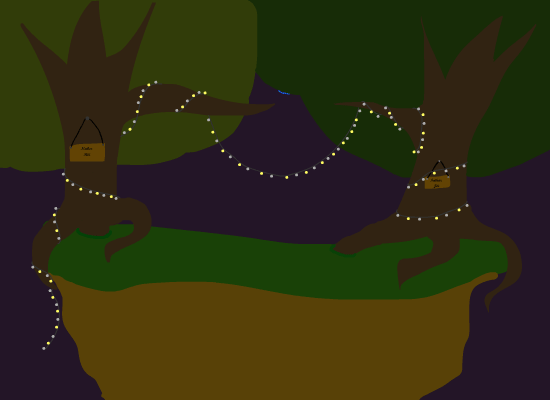
Credit: Sara Plante
|
