Communication Technology: 2205 Photography Composition
Outcomes:
1. apply exposure principles and composition guidelines in photography assignments
1.1 create photographs that demonstrate mastery of basic composition with reference to the following composition guidelines:
1.1.1 simplicity
1.1.2 camera angle
1.1.3 rule of thirds
1.1.4 backgrounds
1.1.5 elements and principles of design
1.1.6 golden triangle
1.1.7 diagonals
1.1.8 formal and informal balance
1.2 demonstrate knowledge of apertures, shutter speeds, one-stop changes, bracketing, and equivalent exposures through log sheets and/or device operation
1.3 use a metering device to determine image capture setting(s) based on the histogram readings
1.4 integrate exposure compensation principles; e.g., underexposing compared to metering
2. demonstrate proficiency in the theory and practice of composition guidelines when processing images, proofing and displaying image
2.1 demonstrate basic retouching skills for an image
2.2 process images with an understanding of final proofs and methods of display
2.3 improve images by using image correction techniques such as dodging and burning
2.4 produce a proof
3. produce images demonstrating composition guidelines through processing
4. present a selection of work completed in this course to an audience
4.1 create a display of photographs
4.2 discuss each photograph regarding:
4.2.1 the triangle (aperture, shutter speed, ISO) aspect that was most important in making the photograph
4.2.2 how the composition guidelines help facilitate good arrangement in his or her work
4.2.3 the technical and creative aspects of the work; e.g., quality, focus, interest
4.2.4 areas of challenge/difficulty (if applicable)
4.2.5 meeting school and community standards; e.g., appropriate language
4.2.6 the use of tools and equipment
4.3 participate in peer/teacher assessment
4.4 add the selected work to an ongoing portfolio; e.g., photographs, proofs, log sheets
How to take a photo:
It takes more than accurate focus and exposure to get images with impact. Follow these four steps to effective composition.
1. See the storytelling photo possibility.
2. Move to eliminate everything from the viewfinder that does not contribute to the story.
3. Work to achieve effective composition appropriate to the content using the elements of composition.
a. Select a vertical or horizontal format
b. Decide the placement of the subject in relation to everything else in the scene
c. Move in to use the viewfinder to crop the scene for visual impact
d. Allow visual space in the viewfinder for moving subjects
e. Use depth of field to highlight different aspects of the story
f. Find emotion in the story to capture
g. Find scenes using these elements to highlight the subject
i. Framing
ii. Leading lines
iii. Repetition
iv. Angles for interest
v. Curves and triangles
4. Take the photo.
So, remember this mantra when preparing to take a picture:
See it—Move to it—Wait for it—Take it
General Techniques and Guidelines
Taking a photo that has strong visual impact depends on just the right placement of the main subject and the other elements in the image. That arrangement of elements is called photographic composition.
Effective photographic composition is the result of careful thought and planning by the photographer. Keep these ideas in mind when you are on assignment, and move around to look for the best image.
Things to keep in mind:
Perspective – At which height and perspective do you typically see the world? For most people the answer to this is simply the height we are at while standing, (5-7 feet). So if we constantly see the world from a standing position, why would you want to take all of your pictures from this perspective? When composing an image, always consider different perspectives you could try. Maybe try kneeling down, or laying on your stomach, or maybe holding the camera up high and angling downward. A photo is not automatically “bad” just because it was shot while standing, but it is generally a good idea to switch up the perspective once in a while to really tell a story most people would otherwise miss.
Angle – There is no “rule” for what makes a good shooting angle, as it will always depend on the elements in your photograph. That said, it is a good idea to try multiple angles to see what works best. For example, a slight tilt to the left or right can sometimes draw the eye to elements that did not initially stand out. Try occasionally tilting your shots to see what happens.
Details – There is a rich world of detail that lives right in front of our eyes, but sadly, we often walk right by it without noticing. One of the jobs of a photographer is to bring attention to the world we miss on a daily basis. To do this, try getting right up close to objects to see what else is there. A simple tree stump can often have cracks and valleys that give you the makings of a beautiful photograph. Look for texture in the world, zoom in, and try to bring attention to it whenever you are able to.
Subject Level – Whenever shooting a specific subject, it is generally a good idea to take your photo at the subject level. For example, dog photos are amazing, but when we take them from a human level, (standing, looking down at the dog), the photo is boring. Kneel down and shoot at the level of your subject’s eyes. This works for small children, flowers, really anything that is not already your height.
Assignment 1: Composition Principles
Illustrate your mastery of photographic composition. Your task is to take 3 pictures illustrating each of the concepts below:
1.1.1 simplicity
1.1.2 camera angle
1.1.3 rule of thirds
1.1.4 backgrounds
1.1.5 elements and principles of design (choose 1 of your favorites) (i.e. negative space, path of direction, line)
1.1.6 golden triangle
1.1.7 diagonals
1.1.8 formal and informal balance
Do not modify or any of your original photographs. The purpose of the assignment is to use the settings in the camera to achieve your results.
Please label your photos as per the effect you were going for: ex. Backgrounds1
You will have a total of 8 slides and 24 pictures.
The Elements and Principles of Composition
|
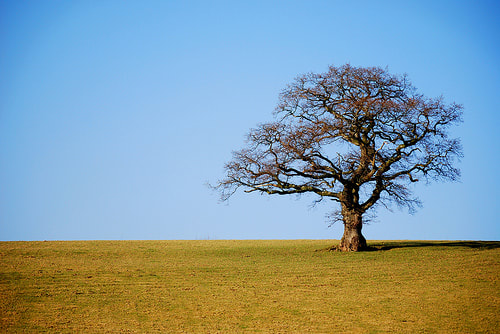
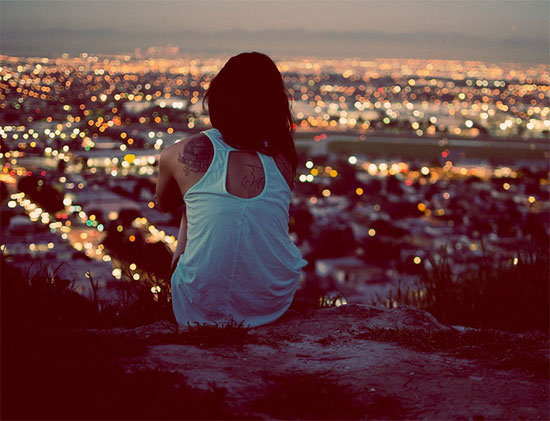
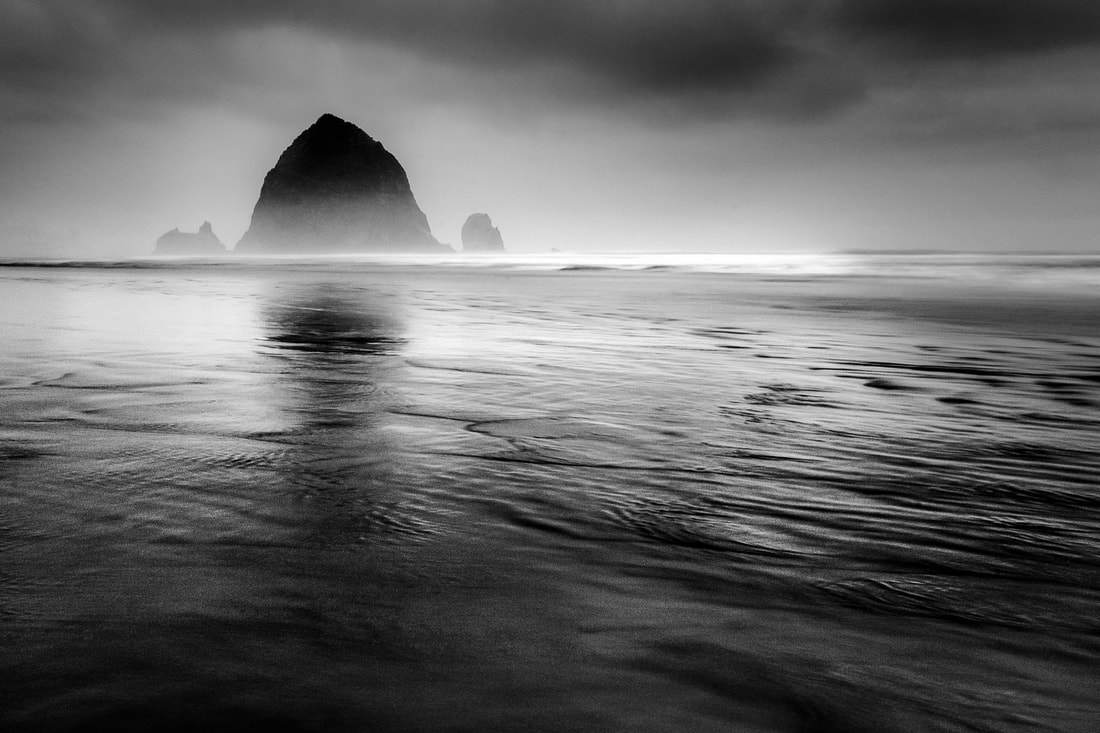
Simplicity - Several methods can achieve simplicity in a photograph. The most obvious is to place the subject against a neutral background such as a backdrop or the sky. Backgrounds can be entirely neutral, like a solid backdrop or a cloudless sky; or they can complement the image, like a starfish on the sand.
|
|
|
Angle/point of view – The direction from which you are viewing an image puts the subject in a different perspective. Try to change your angle so you are looking at your subject from a different point of view. Photograph the world in a way you don't normally see it!
|

|
|
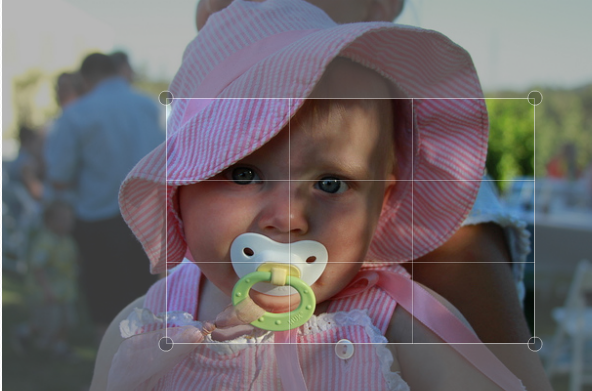
Rule of thirds – Placing the main subject of a photo right in the center makes the image boring. Make your pictures better by placing the subject (main thing in the picture) to the left or the right side of the shot.
|

|
|
Backgrounds - In photography the background is the part of the overall scene. It's behind the main subject of the photograph. Proper design and use is crucial to photographic success. Recent trends minimise backgrounds, where possible, to focus on the main subject.
|
|
|
Framing – You can draw attention to the subject of the image by using objects or people in the foreground as a frame. This framing is most effective when the foreground is slightly out of focus and contrasts in tone with the main subject. The most effective frames are those that appear naturally in the scene. But make sure your frame does not become an unwanted center of attention.
|

|
|
Filled Frame – Getting in close to a subject, or using the zoom lens, and filling the viewfinder with the subject makes for a better image. If you think you are in close enough, take another step forward and check the viewfinder again. You might just have an even better image
|

|
|
Contrast – The degree of black and white, light and dark, and color tones in an image. The difference in the amount of light or the colors in the image can be used to draw attention to the main story.
|

|
|
Depth of field – This is the distance between the nearest and farthest objects appearing in sharp focus. Larger apertures allow more light into the camera and produce shallow depth of field, enabling the photographer to blur the foreground and background to sharply define the center of visual interest. Depth of field increases with smaller aperture.
|

|
|
Repetition of pattern – A repeating pattern, created by people or objects, is visually interesting. When one element is slightly different than the others, the visual impact is increased and an effective center of visual interest is created. A photo of five people watching a basketball game, for example, creates a repeating pattern of faces, which becomes more interesting if one of them has an unusual expression
|

|
|
Curves – Like leading lines, curves can add interest to a photo and help place emphasis on the main subject. Automobile advertising images, for example, often show a car on a winding road, drawing attention to the product and adding movement.
|

|
|
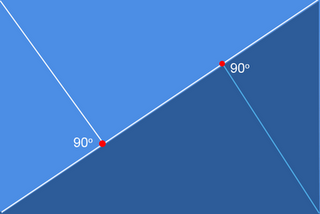
Golden Triangle - The golden triangle is a classical rule of composition used in paintings and photography. This timeless rule states that to create a harmonious image, the main subject should describe the shape of a triangle.
|
|

|
|
Leading lines/ Diagonals – A pointing arm or a stair railing can emphasize the subject if they lead the eye directly to the main subject. Leading lines are especially effective when they lead the readers to a center of interest in the photo’s background. As with frames, leading lines should provide eye direction rather than distraction. Leading looks, when several people in a photo are looking at the same thing, have the same effect.
|

|
|
Formal/Informal Balance: The composition of a photo affects the way the whole picture is perceived. If everything is symmetrical it is balanced and lacks movement. A photographer will use asymmetry (lack of symmetry), or unevenness, to create visual interest, tension and movement.
|

|
|
Assignment 2: Processing Cropping
Choose 5 of your original photos from the first second and crop to make them more visually appealing. You will need to do this in photoshop. You will have 5 slides, each with the original photograph and the cropped version. Label each slide, crop 1, crop 2, crop 3 etc.
Here is a cropping tutorial for those that don't know how: (essentially "c" on the keyboard in photoshop)
https://www.youtube.com/watch?time_continue=38&v=6IPsFtYQ6UI&feature=emb_logo
Rules and guidelines for cropping follow.
Here is a cropping tutorial for those that don't know how: (essentially "c" on the keyboard in photoshop)
https://www.youtube.com/watch?time_continue=38&v=6IPsFtYQ6UI&feature=emb_logo
Rules and guidelines for cropping follow.

Basic Rules for Good Photo Cropping
1. One main reason for cropping is to eliminate some distracting visual element from the print. Cropping out a distracting foreground, side or background element, will help the reader quickly find and stay focused on the story-telling center of interest.
1. One main reason for cropping is to eliminate some distracting visual element from the print. Cropping out a distracting foreground, side or background element, will help the reader quickly find and stay focused on the story-telling center of interest.
2. Another good reason for cropping is to improve the composition of the photo. Knowledge of the principles of photo composition, combined with careful cropping, can create a rule-of-thirds position for the center of interest.

3. In sports action photos, tight cropping on the center of interest creates visual impact. It does this by heightening the feeling of intensity and action.

4. Perhaps the best advice on cropping is to eliminate any elements in the photo that do not contribute to the story it is telling.
Assignment 3: Processing File Types
In this assignment, I want you to go into the camera and attempt to take the same photo as 3 different file types, both as original raw as a TIFF and a Jpeg. You will need to mess with the settings on the camera. Once taken, please make 1 Photoshop slide that compares the 3 types. Drop this in your composition folder and label it, file types.
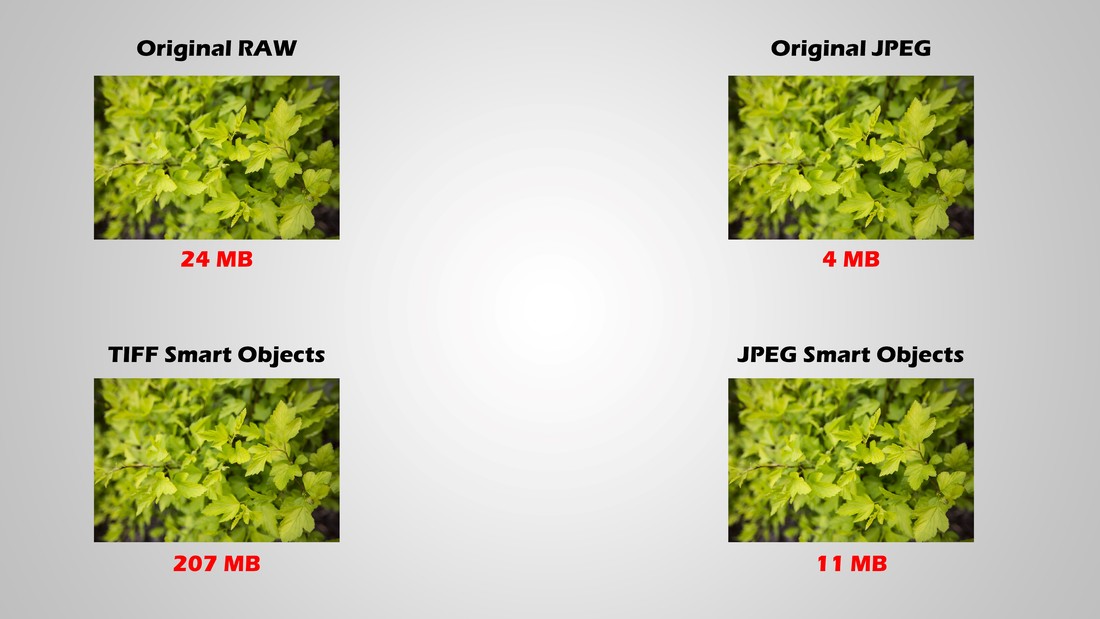
RAW vs JPEG
When you go to take a picture, you have the option to set the camera in either RAW or JPEG format, (or you can have it shoot both simultaneously). Raw files are considerably larger than their JPEG counterparts because the RAW file has not yet been compressed. A common misconception is that because they are bigger, RAW files must be “better” looking photos. In reality, a RAW photo looks more or less the same as a JPEG. The difference between the two files the amount of room you have to edit the file. Since a RAW file still has all of its data, you can edit things like saturation, exposure, contrast to a much greater extent.
When you go to take a picture, you have the option to set the camera in either RAW or JPEG format, (or you can have it shoot both simultaneously). Raw files are considerably larger than their JPEG counterparts because the RAW file has not yet been compressed. A common misconception is that because they are bigger, RAW files must be “better” looking photos. In reality, a RAW photo looks more or less the same as a JPEG. The difference between the two files the amount of room you have to edit the file. Since a RAW file still has all of its data, you can edit things like saturation, exposure, contrast to a much greater extent.
TIFF vs JPEG
If you have limited space and you do not plan on printing the picture, go ahead and save it as a JPEG. If you plan on printing, put it in CMYK and save as TIFF. TIFF is lossless where JPEG compresses and loses information.
If you have limited space and you do not plan on printing the picture, go ahead and save it as a JPEG. If you plan on printing, put it in CMYK and save as TIFF. TIFF is lossless where JPEG compresses and loses information.
Assignment 4: Watermark
Part of photography is displaying/promoting your work as well as protecting yourself from plagiarism and copyright infringement. In photoshop craft a watermark to sign and protect your photos. Your watermark will need a business name or your name and say photography at the bottom. Here is an example:

Final: You must choose one photograph to display from your portfolio, watermark it, make it ready to print and send it to MacLean for print and display.
Evaluation Rubric: