Communication Technology 1035: Graphics Tools
Prerequisite: Comm Tech 1005 - Visual Composition
Outcomes:
1. investigate graphic programs
1.1 describe key features of graphic programs, considering:
1.1.1 purpose/use
1.1.2 resources required
1.1.3 cost
1.1.4 ease of use
1.1.5 industry standards
1.2 explain the advantages of using vector-based versus raster-based formats
2. select and use appropriate applications to create basic vector and raster graphic images
2.1 understand and use the primary program interface, using correct terminology
2.2 understand the importance and purpose of various file formats, resolutions and file sizes
2.3 set up a new document, considering:
2.3.1 size and type of output
2.3.2 units of measure
2.3.3 bleeding
2.3.4 use of colour in graphics
2.3.5 appropriate colour mode
2.3.6 pixel ratio
2.4 import images from various image-capture devices into a graphics program; e.g., stock images, photographs, scanned images
2.5 use help functions and references as appropriate
2.6 demonstrate use of basic tools; e.g., selection, crop, slice, drawing, type, retouching, reshaping, symbol, graph, annotation, measuring, navigation
2.7 create and/or manipulate original vector and raster graphics
3. organize and manage image files using correct file conventions
4. identify copyright restrictions and permissions and put them into practice
5. present a selection of work completed in this course to an audience
5.1 discuss work regarding:
5.1.1 how the elements and principles of design help facilitate good composition
5.1.2 the technical and creative aspects of the work; e.g., quality, uniqueness
5.1.3 areas of concern/difficulty (if applicable)
5.1.4 meeting school and community standards; e.g., appropriate language
5.1.5 the use of tools and equipment
5.2 participate in peer/teacher assessment
5.3 add the selected work to a portfolio
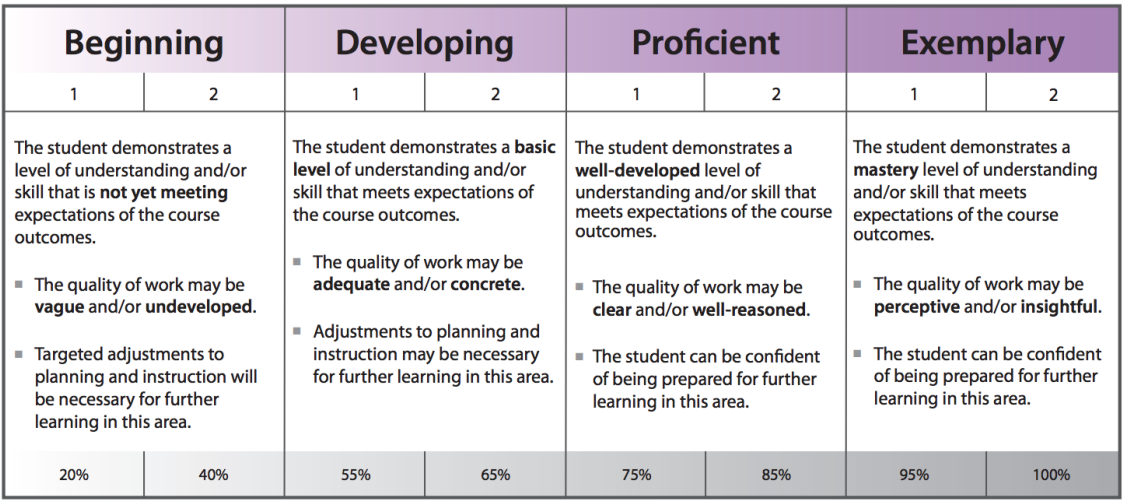
High School Assessment Rubric:
Raster Versus Vector Graphics
Whats the difference? Here is a handy informational video.
Assignment 1 (Adobe Illustrator): 8 Bit Artwork (Vector Grapics) - Paint Bucket, Grid Tool, Stroke vs Fill
In this assignment you are tasked with creating or recreating your own 8 bit pixel art in Illustrator.
Steps:
1. Choose a suitable 8 Bit image (or pixel art). For example:
Steps:
1. Choose a suitable 8 Bit image (or pixel art). For example:

|

|
2. Open Adobe Illustrator with a new document, use a document that will fit the proportions of your image. i.e. if its tall, make sure your artboard is tall. Experiment with dimensions.
3. Start by making a grid by right clicking on the line segment tool and choosing the rectangular grid tool, experiment with how many boxes you want your grid to have: 50x50 are small boxes, whereas 16x16 are large boxes. Important: make sure fill grid is checked at the bottom of this menu.
4. Right click on "shape builder tool" and choose "live paint bucket". Choose a colour at the bottom and begin filling in the squares! (Live paint groups are extremely powerful in illustrator, don't forget the paint bucket as you move forward!)
5. Once your done painting, its time to remove the grid. Click on the grid, choose stroke in the colour boxes at the bottom and choose: "none". The grid should disappear and you're left with a finished 8 bit piece of art!
6. Here is a tutorial for the visually inclined: https://www.youtube.com/watch?v=o3mm-ITC29g
Some student examples: (also see the wall in class)


|


Credit: Kyla Reimer
|
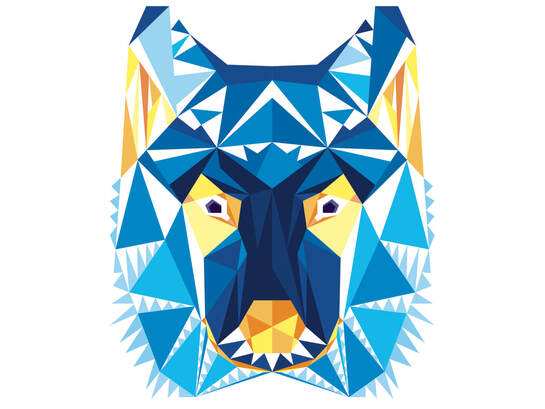
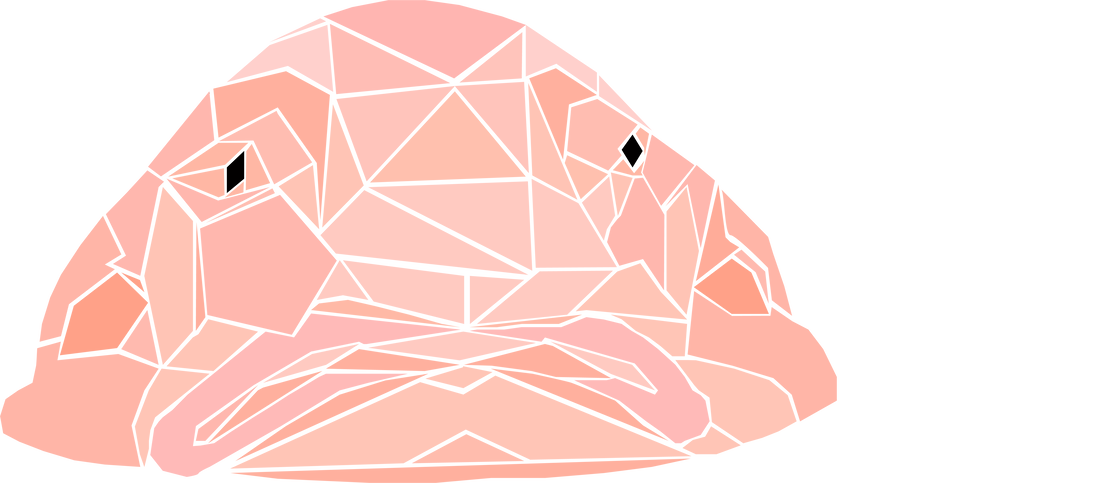
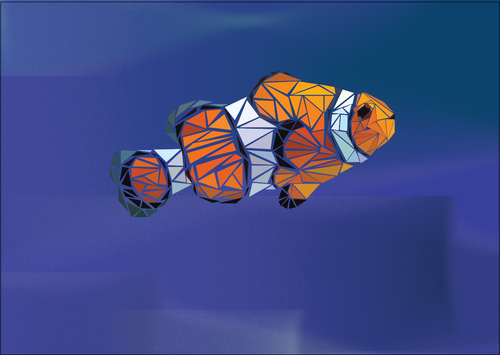
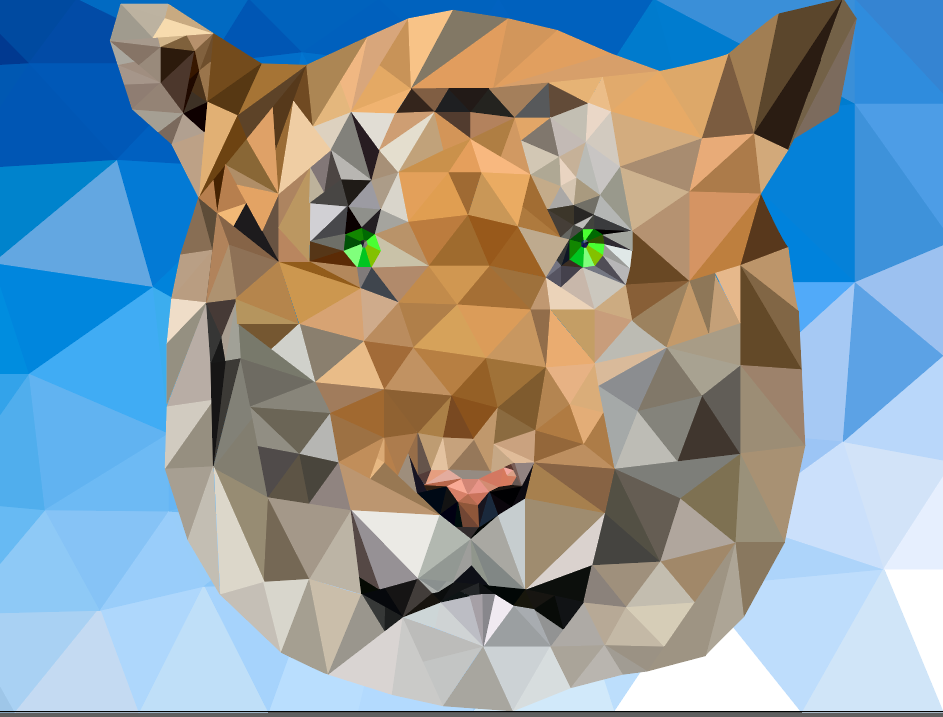
Assignment 2 (Adobe Illustrator): Polygonal Animals - Shape Tool, Pen Tool, Line Tool, Join Command
Use the shape and pen tools to create a polygonal animal. Below are examples. At this point you should know how to import a raster picture of your animal on the background layer, lower the opacity, add a layer on top and start laying and manipulating shapes on top. This should be a simple assignment in which you can start to illustrate your principles of design, in particular negative space. Here are some examples below. Remember probably the most important command in Illustrator is ctrl+J for the join tool.
Credit: Kingston Baptiste
|
Credit: Nathan Weir
|
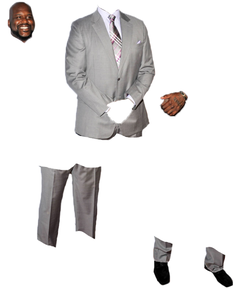
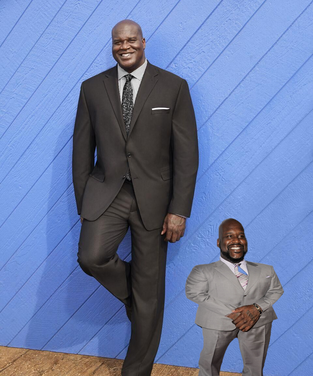
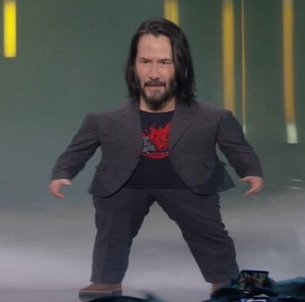
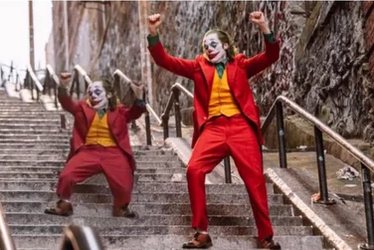
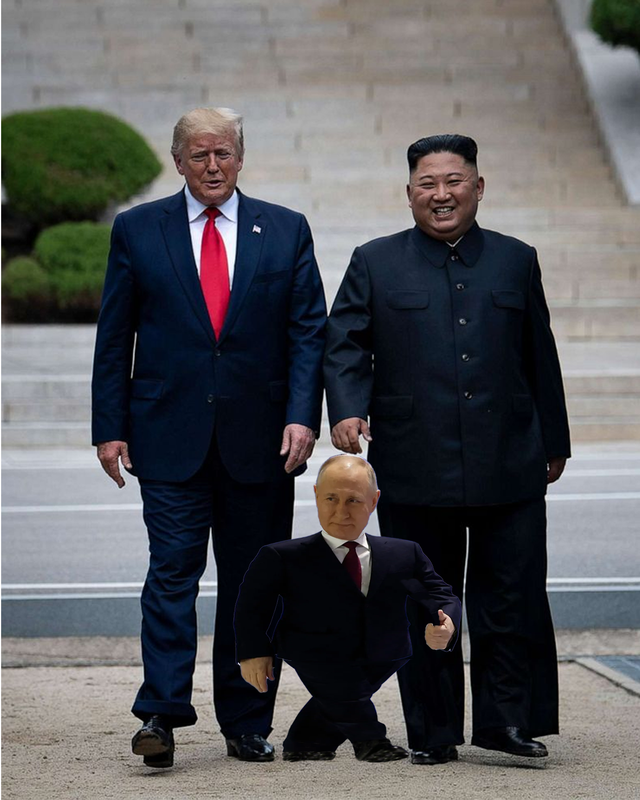
Assignment 3 (Photoshop): Tiny Self - Selection Tool, Transform Tool, Adjustments
|
You've seen the small Keanu Reeves, now your task is to find 2 pictures of someone and mini-fy them.
1. After picking your image, separate the arms, legs and body. your going to need to change the proportions of each body part separately. We are achieving this by using the selection tool and layers. Create a new layer and select a body part copy it to the new layer and use CTRL+T to transform and modify it smaller. I hightly recommend putting each body part on a new layer and naming that layer. This will help later when adjusting body parts on top or below each other. 2. Arrange and transform all your body parts into a tiny self. Adjust layers by dragging them above or below other layers to make the image appear seamless.
3. Merge your image together by converting them to a smart object, and select that object again. Copy and paste it into the second picture with a normal sized self. 4. With your tiny self still selected, go to image>adjustments>match colour to adjust the images to look seemless.
Save as a png and hand in. Here are few examples. Notice the colour correction on the Joker isn't quite right... |

|
|
|
Credit: Hossein Faraj
|
Credit, Brandon Theede
|
|
Assignment 4 (Photoshop): Perform a Faceswap on Adobe Photoshop (Raster Graphics) - Lasso Tool, Auto Blend
Please perform a faceswap using Adobe Photoshop.
Choose two pictures or one picture with two faces present.
Here is a 5 minute photoshop intro tutorial to start you off:
https://www.youtube.com/watch?v=KAmSB5MQxOo
How to Swap Faces in Photoshop
Youtube Tutorial: https://www.youtube.com/watch?v=SLHWlAm0PiQ
Steps:
1: Open your image files in Photoshop
Open the two headshots in Photoshop by clicking File and selecting Open from the dropdown menu. It’ll open a new window where you can select the photos.
You can select both by holding the CTRL key while you click the second file.
2: Select the face you want in your final photo
Click on the file tab that corresponds to the face that you want in the final photo. Select the Lasso Tool by pressing L on the keyboard or selecting it from the tool menu. Carefully trace around the eyebrows, nose and lips. It’s best to select only the most highlighted portions of the face so that you can swap faces with a more realistic outcome. It’ll have a flashing dotted line around it when you’re finished.
3: Copy the image
Click CTRL+C to copy the selection. Make sure the dotted line is still flashing.
4: Paste the image
From the tabbed workspaces, select your workspace that contains the face from your original shot that you want to replace. This will be your “body” layer. Press CTRL+V (COMMAND+V on Mac) to paste the copied face to the photo. Then press CTRL+D to deselect the face and remove the flashing line.
5: Resize the image
Adjust the layer to 30% opacity so that you can see beneath the layer. Using CTRL+T, position the face by lining up the eyes and mouth, stretching as needed to get them to line up as closely as you can.To adjust the face proportionately hold the Shift key and click the box and drag. If you hover near the corner, it will give you rotation toggles that allow you to turn the image.Getting the faces to line up well will require some patience, and a little trial and error using your eye to find the position that looks most natural. Once you’re happy with the placement, press Enter to finalize your placement. This is really important. If you forget to press Enter when you finish, all of your hard work will be lost. Then adjust the layer opacity back to 100%.
6: Copy your background layer
Next, you’ll need to duplicate your background layer. From the layer menu select your background layer. You can right click and select Duplicate Layer or use the keyboard shortcut by pressing CTRL+J . Rename the copy layer “body” as it will make up the majority of your final photo. Go ahead and click on the Visibility Eye to hide the background layer.
7: Create a clipping mask
Press CTRL while clicking the thumbnail of the face layer. This will select the shape of the face on all layers. Select the body layer and click on the Visibility Eye of the face layer to hide it. After the background and face layer are hidden you will only see the layer you have selected.
8: Create a slight overlap of the face with the body. Go to the Photoshop menu in the header and click Select. Then choose Modify and select Contract.
In the dialogue box, type 10 pixels. This will shrink the clipping mask by 10 pixels which will allow the face to overlap the body by a few pixels.
9: Delete the face from the body layer
While the body layer is still selected, press Delete or Backspace to remove the area beneath the face. Press CTRL+D to deselect.
10: Select the body and face layers. Go to Edit in the Photoshop menu. Select Auto-Blend Layers from the dropdown menu. A box will pop up (see screenshot below). Select Panorama and check the box for Seamless Tones and Colors and Content Aware Fill Transparent Areas before clicking OK.
Examples:


|


|
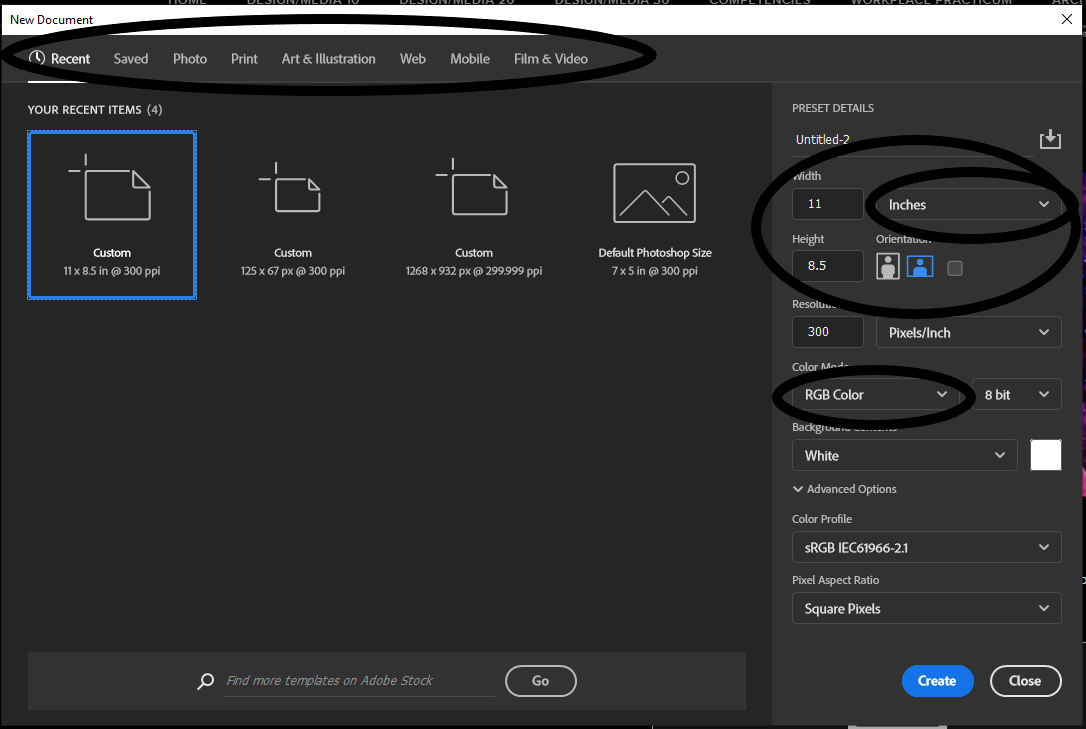
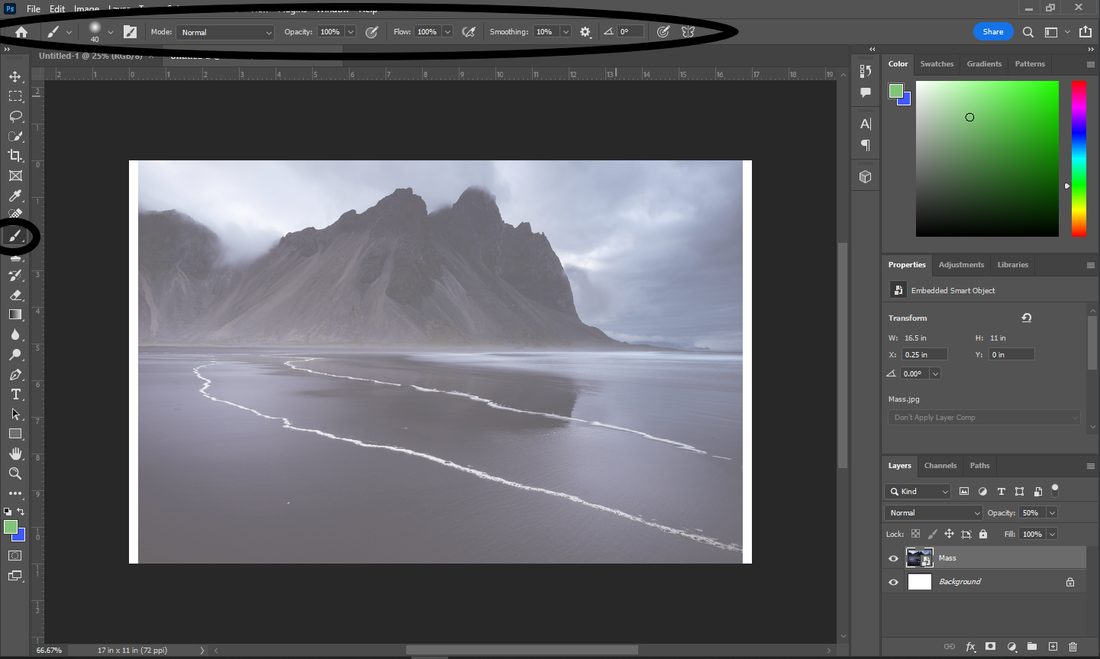
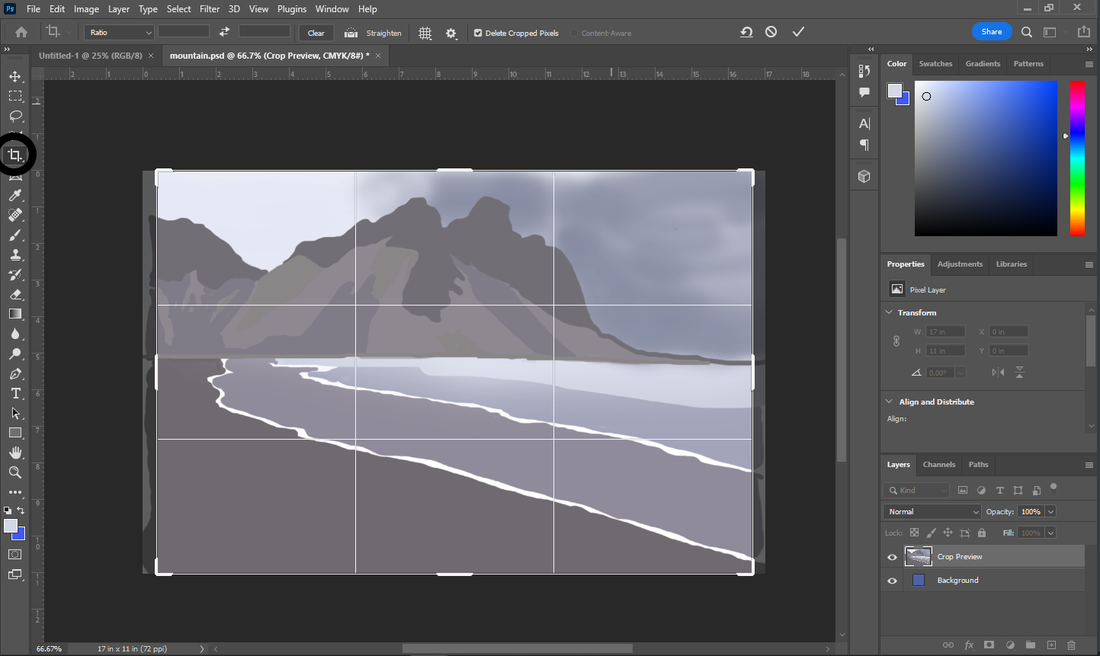
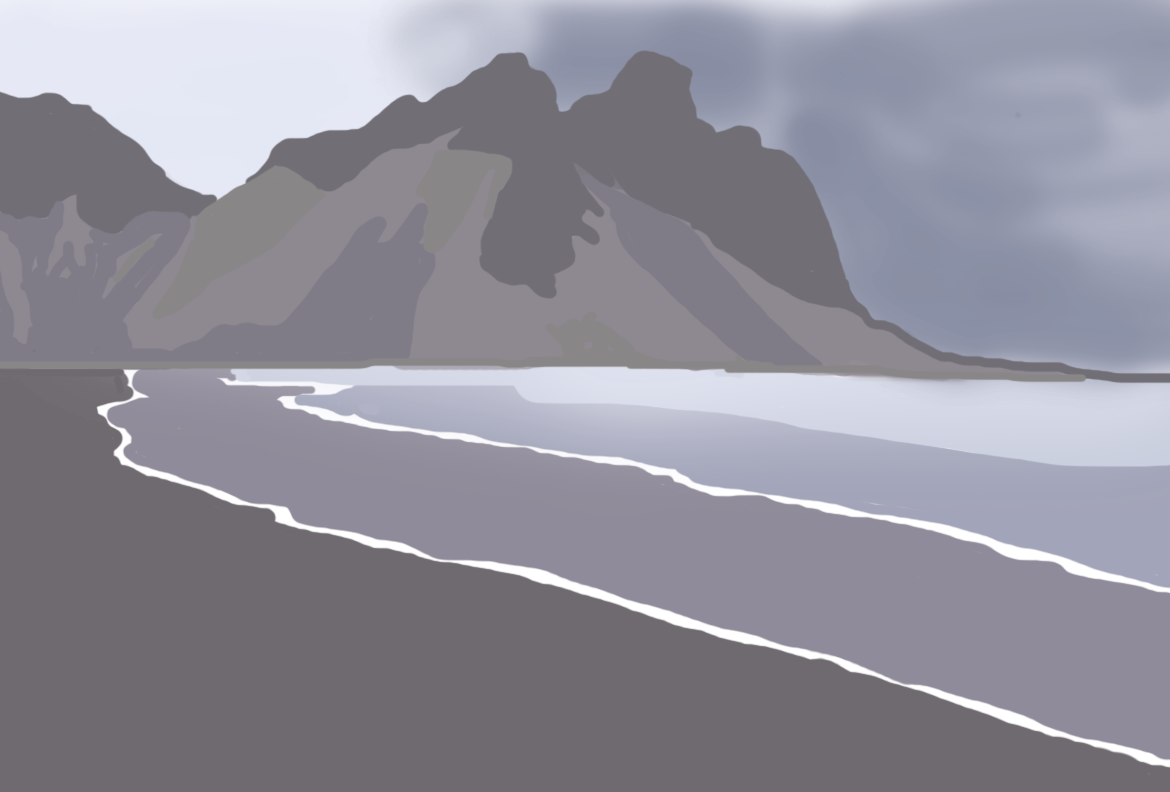
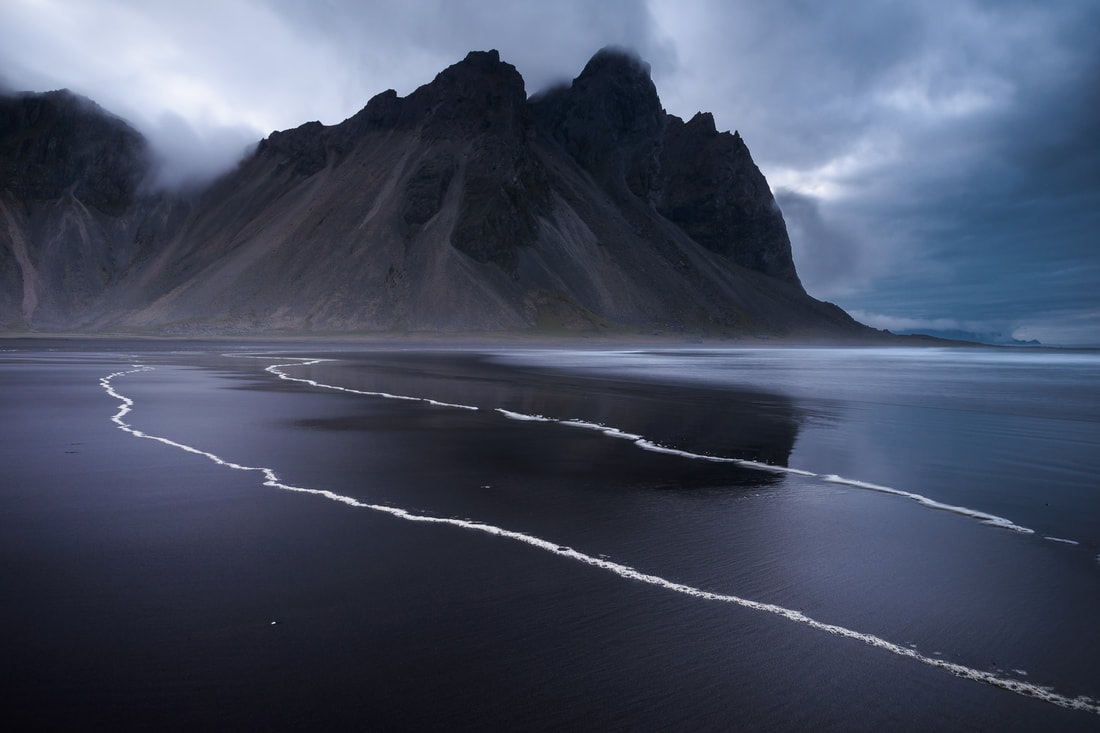
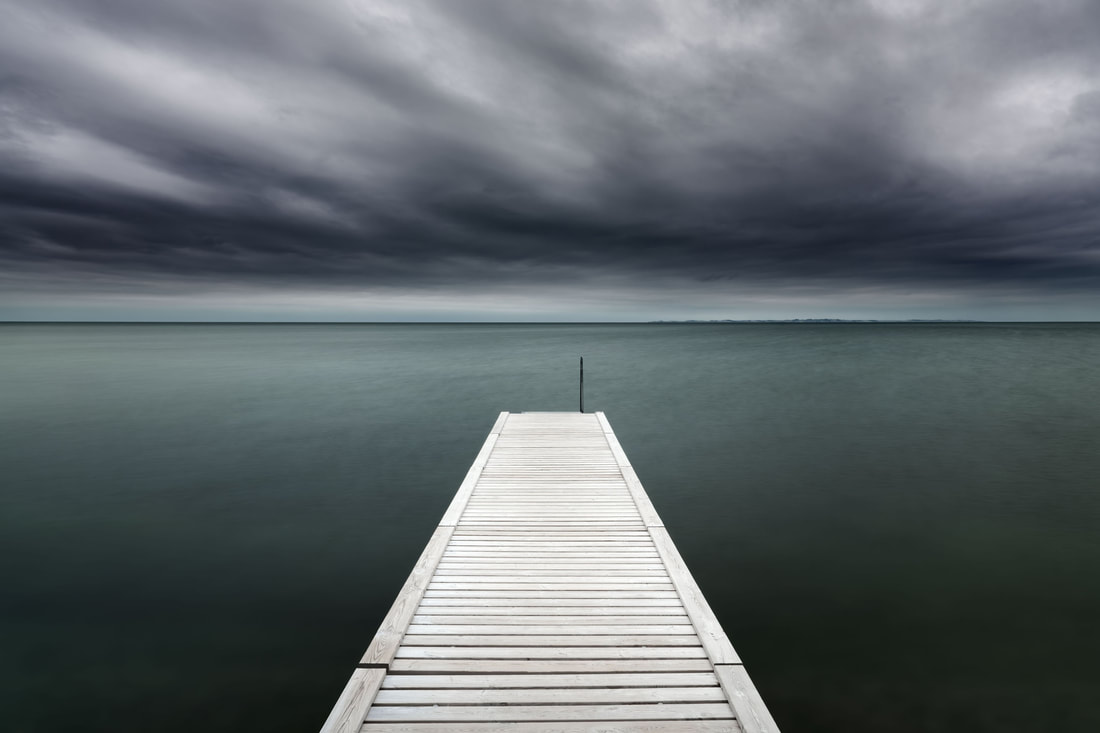
Assignment 5: Free Draw - Brushes, Shading, Eraser, Colour, Document Setup, Crop Tool
Photoshop has two threads to it. Photo and image manipulation, and artistic expression. In this assignment, your task is to recreate a photo of your choice using the brush tool and eraser. Document setup will also be graded.
|
1. Set up a document. I want the document to be 11 inches by 17 inches in landscape mode. I also want the colour mode to be cmyk. The reason being cmyk is made for printing and realizing artwork in physical form, while rgb is for digitial designs. i.e. posting on a website. I might want to post your work, therefore we will chose cmyk and 11x17 to have a nice piece of art to print at the end. Leave everything else, default. Note that there are various clickable templates above.
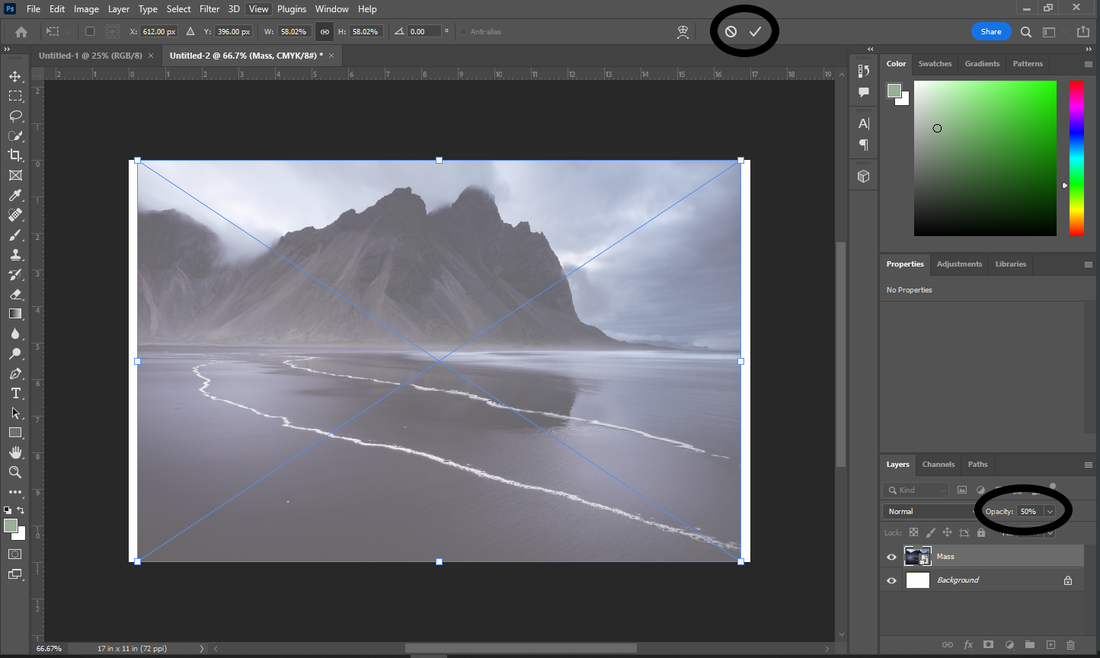
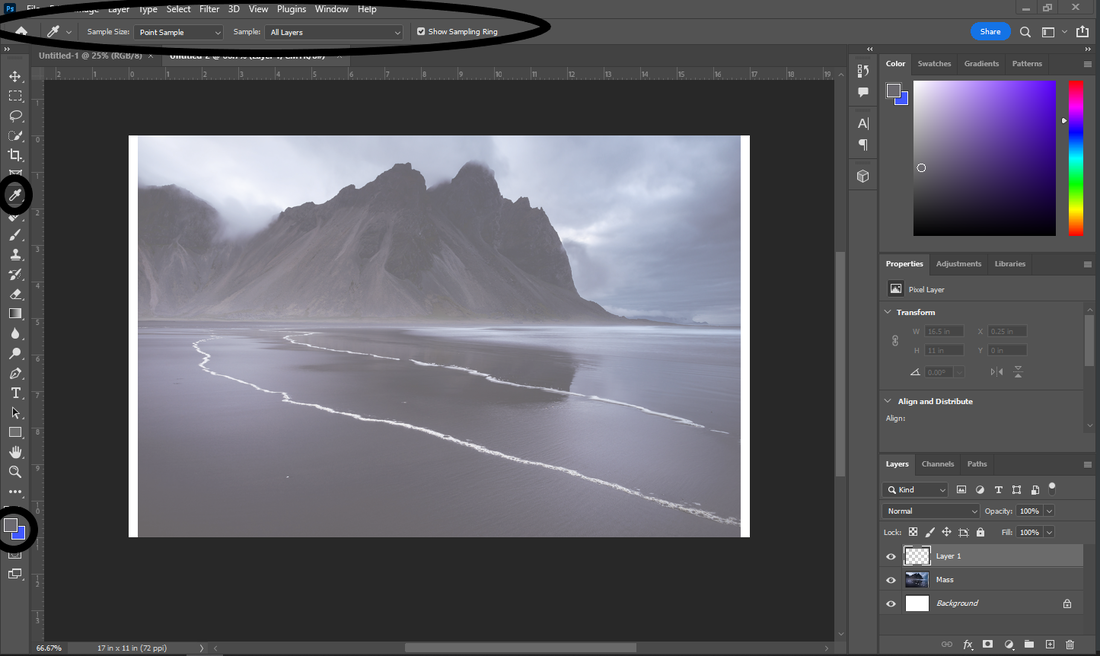
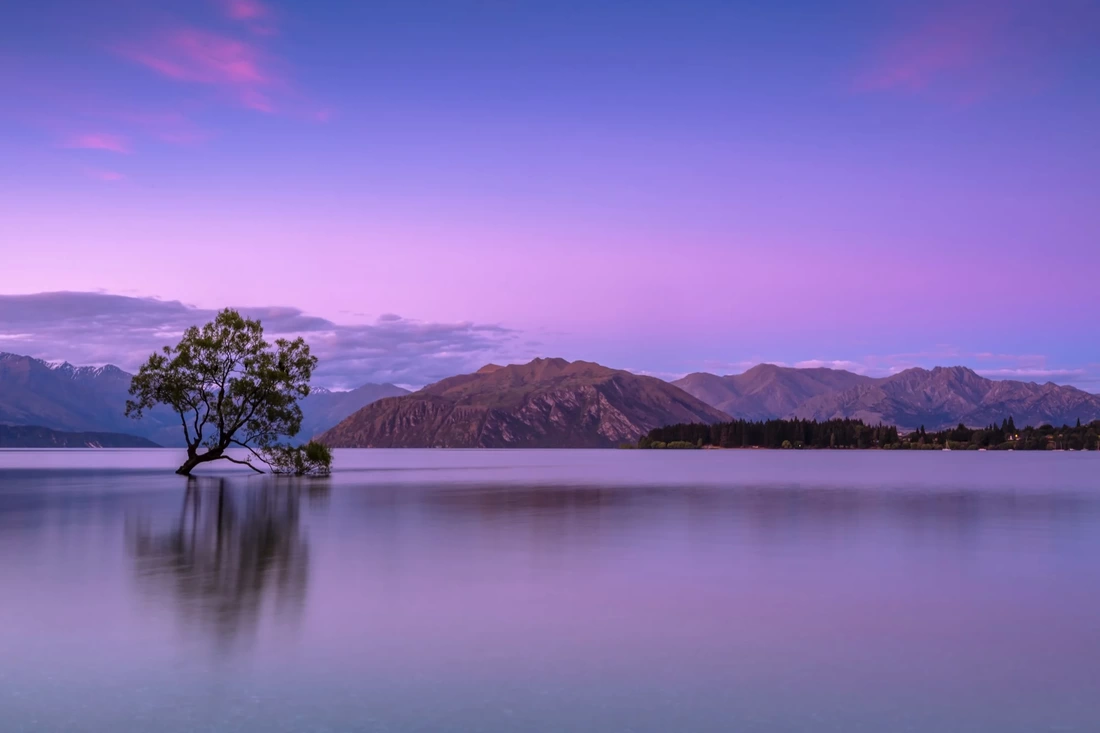
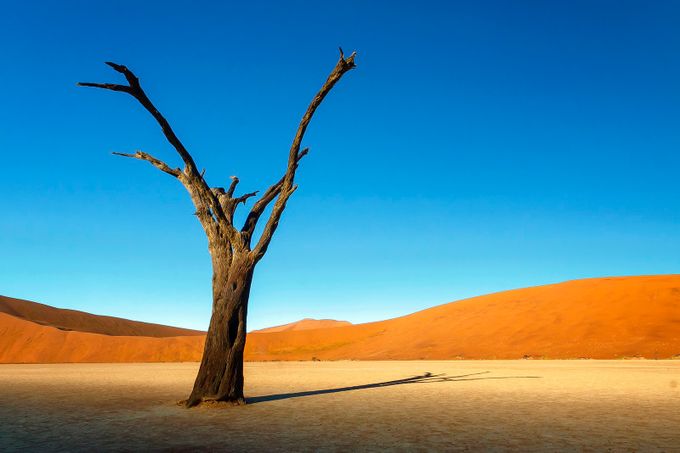
2. Find a simple landscape photo on google. I have provided a few examples of photos that would work well, but feel free to find something that resonates with you. Drag the photo file into photoshop.
3. We are going to CTRL+T and turn the opacity down on the picture again so we can begin to paint on top of it. Remember to commit your changes with the checkmark at the top when done.
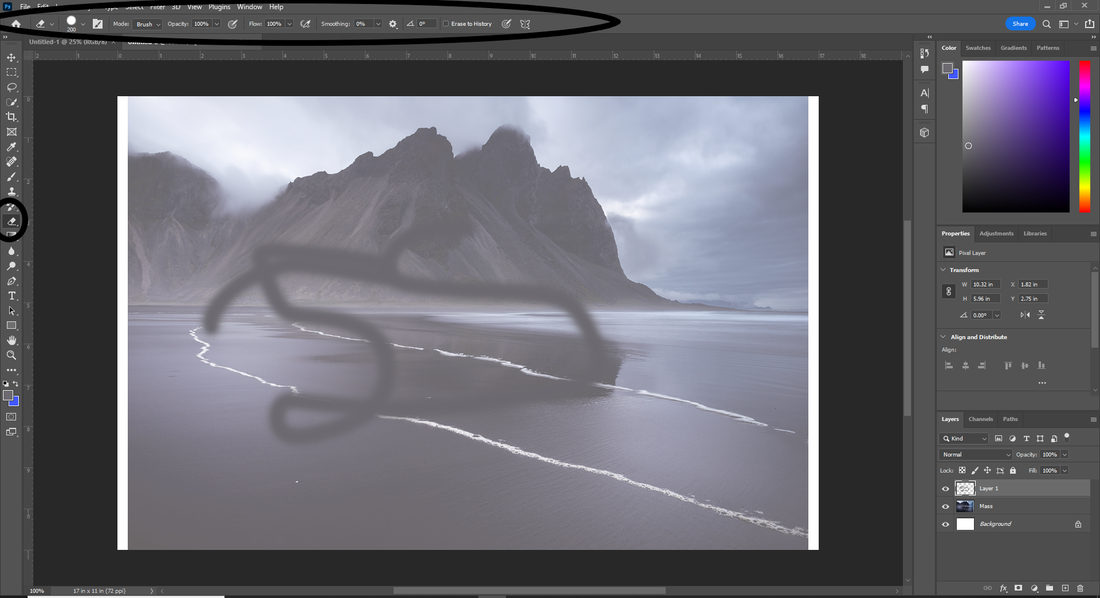
4. Its time to add some layers, grab some brushes, and go to work recreating this photo as a piece of art. First things first. Brush and Eraser. One of the most important things to know about the brush is that it is heavily customizable. There is a full toolbar at the top that appears when the brush is selected. I am not going to go through all of the brushes and presets, but take note that sometimes things are hidden behind little cogs. You must explore all the options in brushes to become a good photoshop artist. Use many layers! And save your work.
Remember, [ and ] change your brush size! 5. Want to match that colour perfectly? The eyedropper tool makes that a breeze. Add a layer on top of the image and click the eyedropper tool on the image and the colour for the brush will match perfectly. Paint from there. A reminder that whenever you click a different tool, a whole different toolbar will pop up at the top with more properties to choose from. Even the eyedropper tool.
6. Screw it up? Eraser tool. Remember, the toolbar and the [ and ] keys.
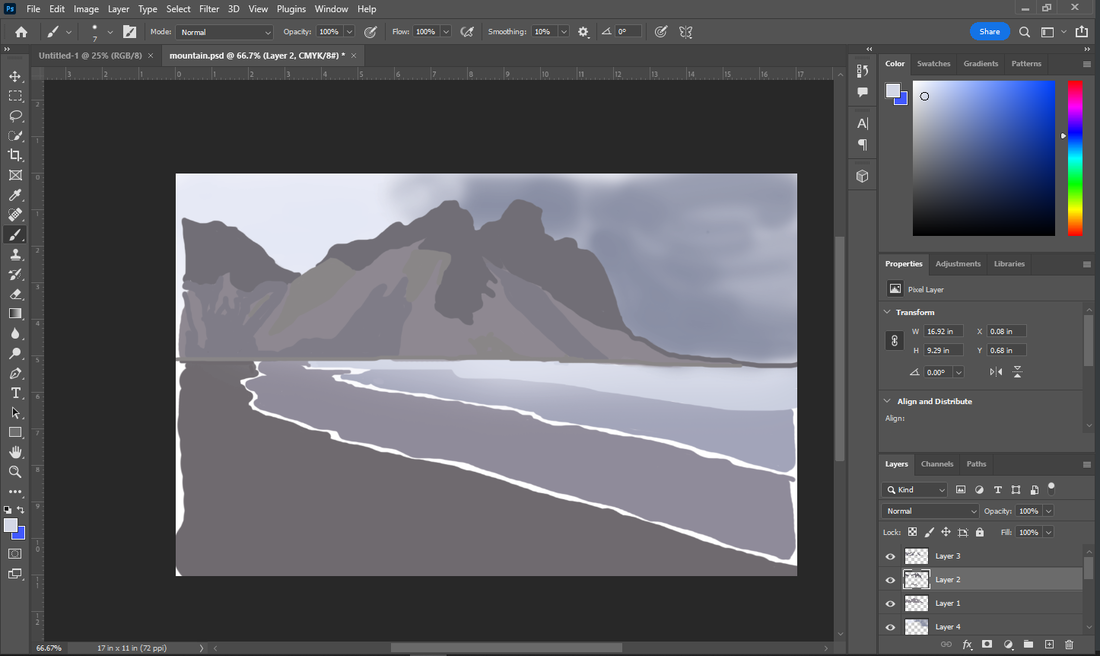
7. When I did this I ended up with about 12 layers and it took me around an hour. Not my best work, but, for example purposes it will work fine. This is approx what you should come out with, but I expect better with the amount of time you have.
8. I want the edges to be clean however, so I am going to use the crop tool. This tool is fairly self explanatory. Move the edges in until none of the bleed shows, or the white to get a clean abstract. Hit ENTER to commit.
9. In a larger size, I would have cleaned up the left lines a bit and smoothed out the clouds so they were a bit less paintbrushy. But not bad for a first try.
Hand in your finished product in .psd file format so I can take a look at what you did. |
|
Exemplars:

Credit: Kendra Cameron
|
